In this blog, we will be installing the latest version of Ubuntu Desktop 19.04 in VirtualBox 6. Ubuntu Desktop is probably the best Linux desktop version mostly widely used.
Lets get started
Step 1 – Download Ubuntu Desktop Image
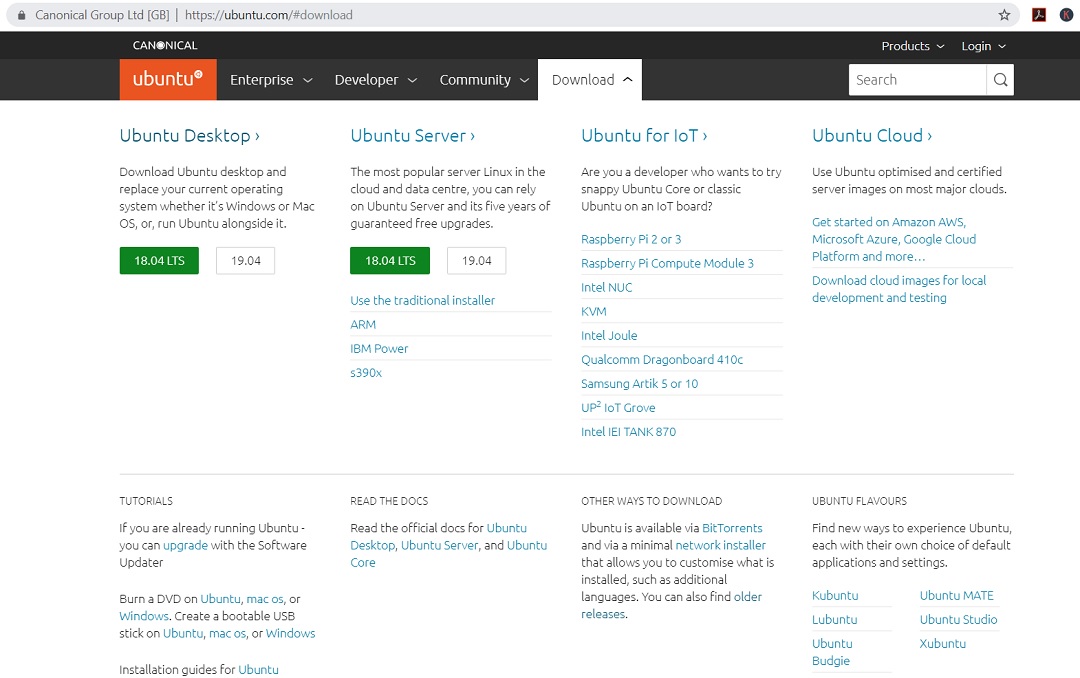
To install the Ubuntu Desktop, we will have to first get the installer ISO image file. You can get it by visiting the official download page.
Ubuntu has decided to drop the support for 32 bit version
Going forward, you there will be only 64 bit Ubuntu OS. If you want 32 bit versions, you will have to use the previous versions such as Ubuntu 16. To download the previous versions of Ubuntu, please visit the Ubuntu Release page.
For 64 bit installer image, the name of the file will be something like this: ubuntu-19.04-desktop-amd64.iso
This is the direct download link for Ubuntu Desktop 19.04. The downloaded file is around 2 GB.
Step 2 – Locate the downloaded file
You can find the downloaded image file in the downloads folder, if you have not changed the default settings. The filename would be something like ubuntu-19.04-desktop-amd64.iso.
Step 3 – Open VirtualBox
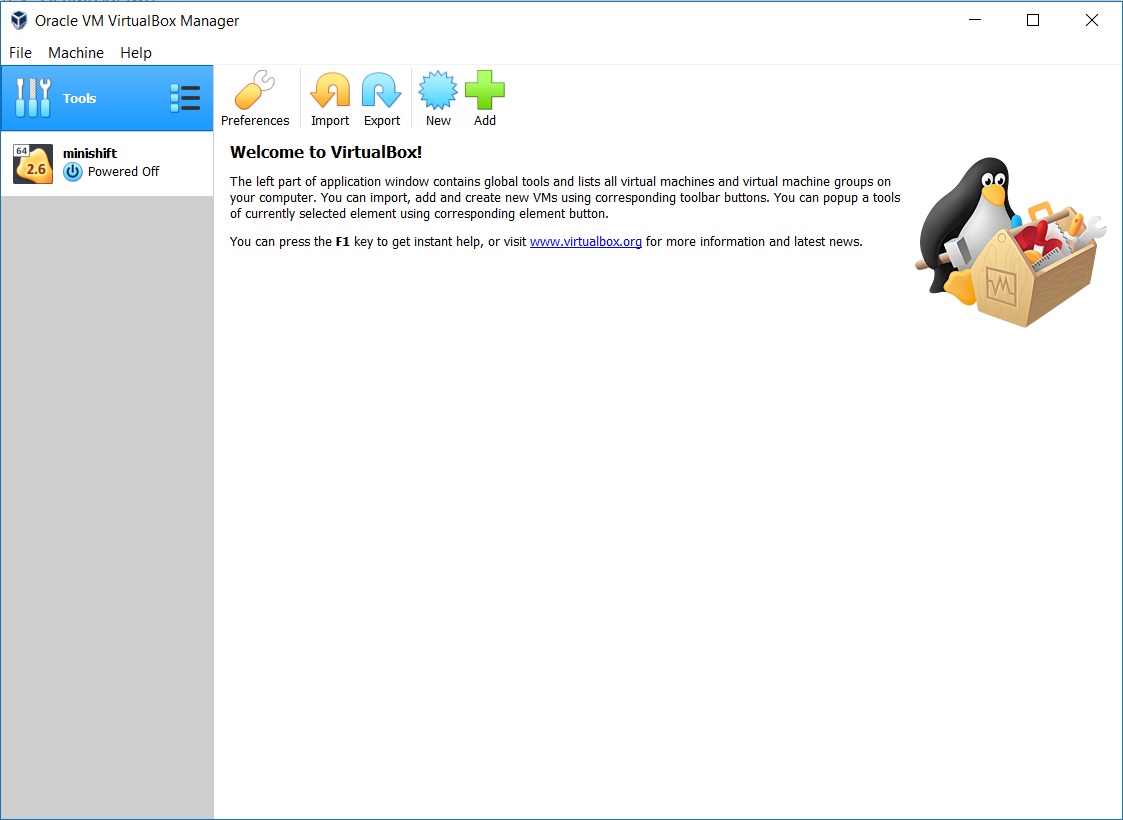
Lets start the installation process. Open VirtualBox. If you don’t have it installed already, please visit my page.
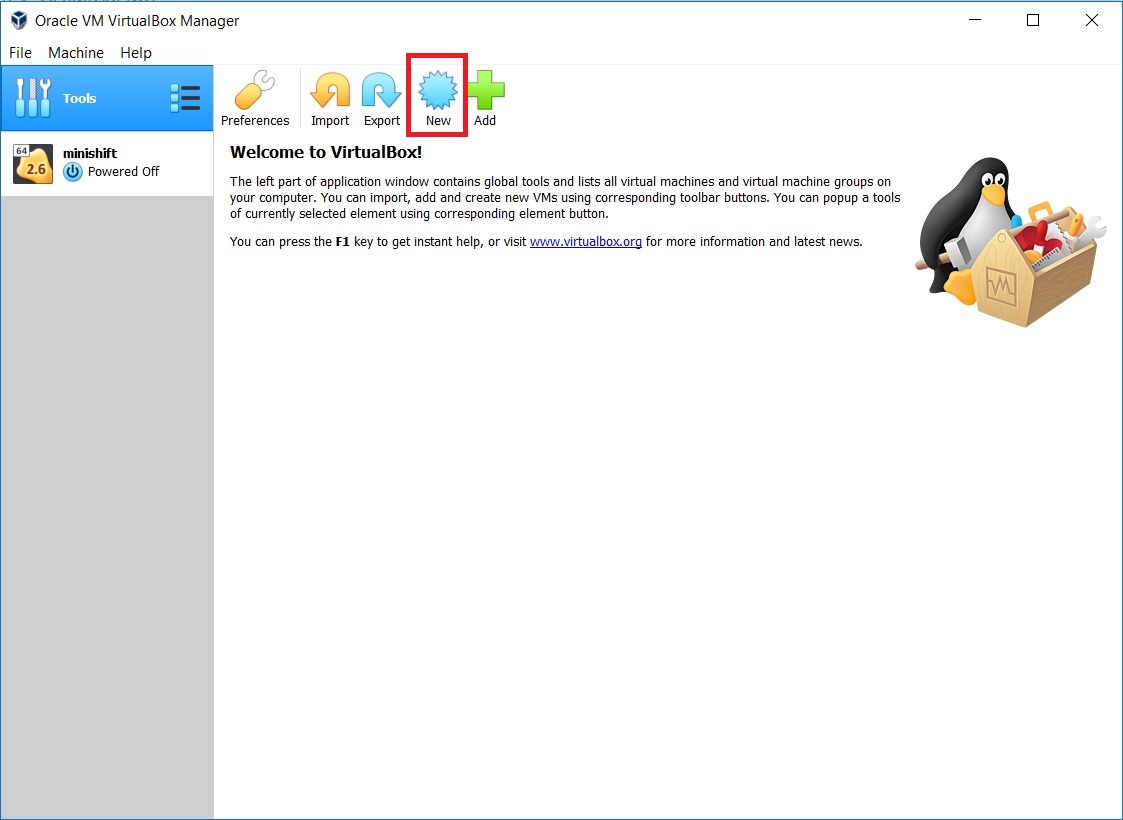
Step 4 – Launch VirtualBox Create Virtual Machine installation wizard.
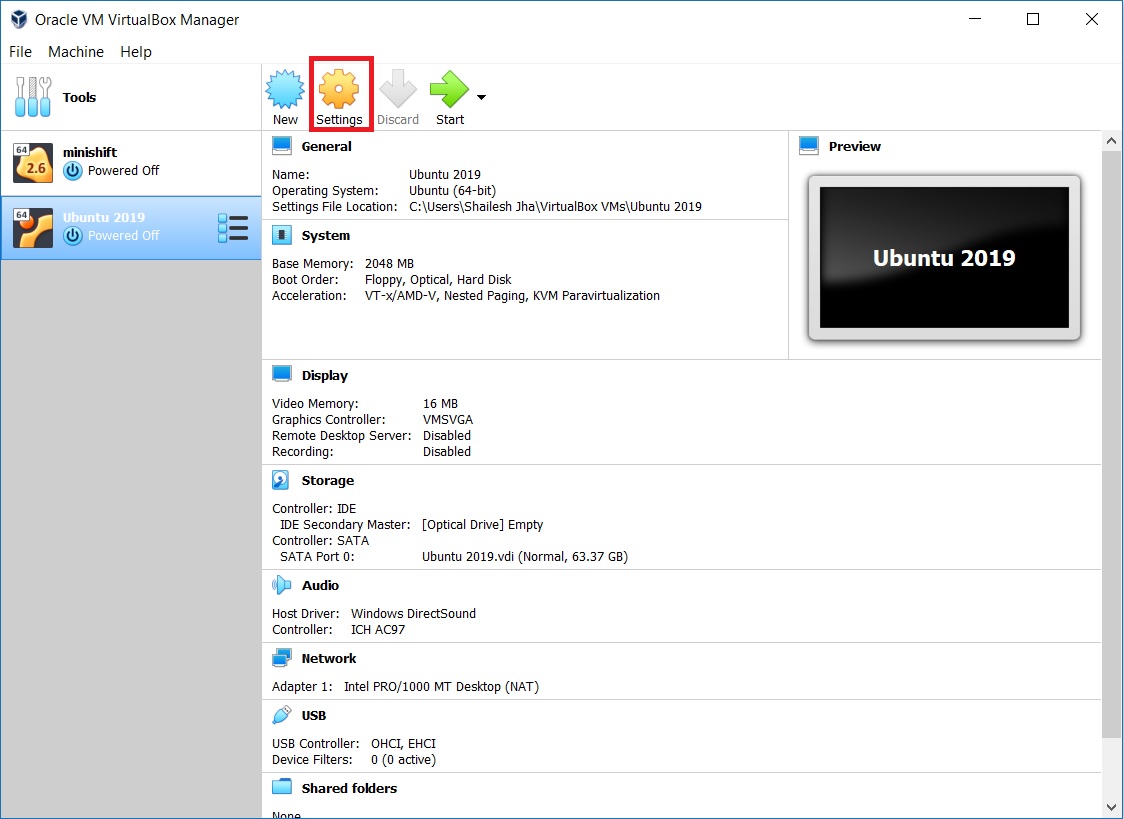
You can launch this by clicking gear symbol highlighted in Red. The keyboard shortcut is Ctrl + N on Windows.
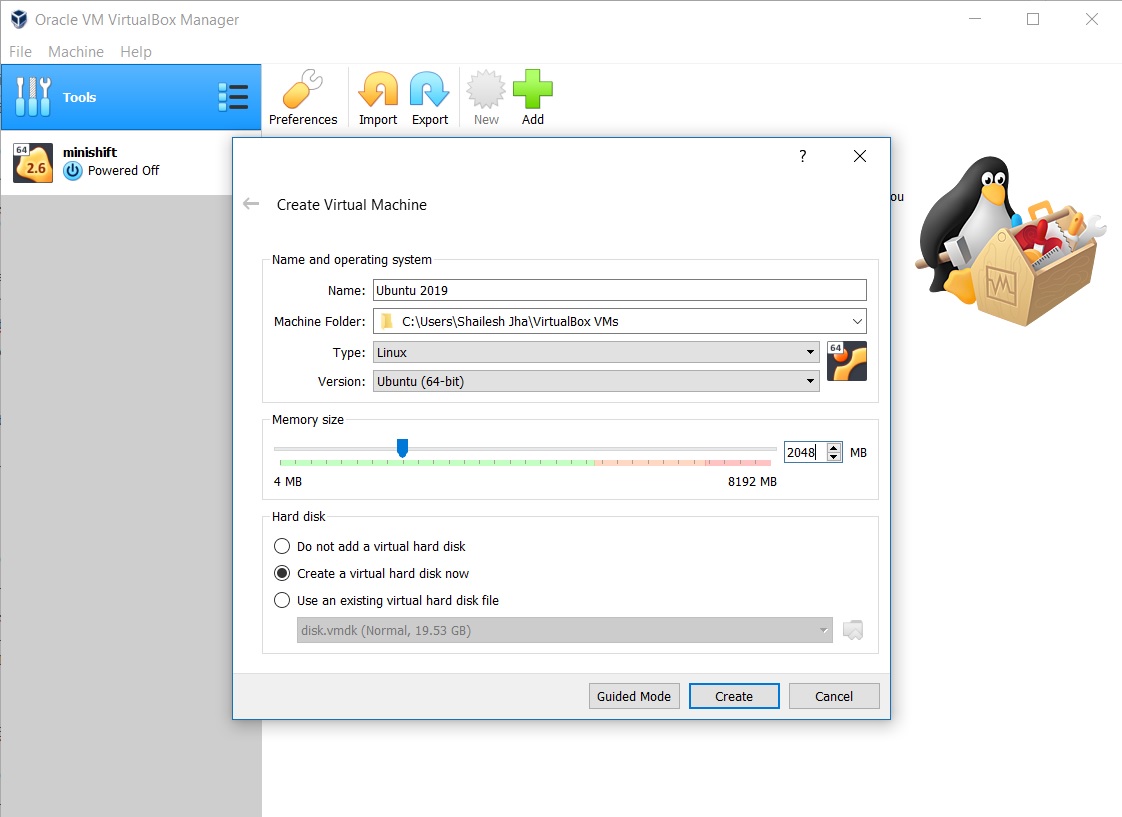
In the Create Virtual machine dialog box, enter a Name for the Virtual machine. This can be anything you want. VirtaulBox will also create a folder by this name in your computer to store the virtual machine files, path to which is your users folders which typically is something like “C:\Users\User name\VirtualBox VMs” by default. User name is the name of the user you are logged in as in windows which will vary for all of us. Specify the memory to be allocated to the VM. I generally feel that 1 GB is not sufficient and increase the memory to 2 GB which is 2048 MB.
Select Type: Linux
Version: Ubuntu(64 bit)
Select Click create to continue.
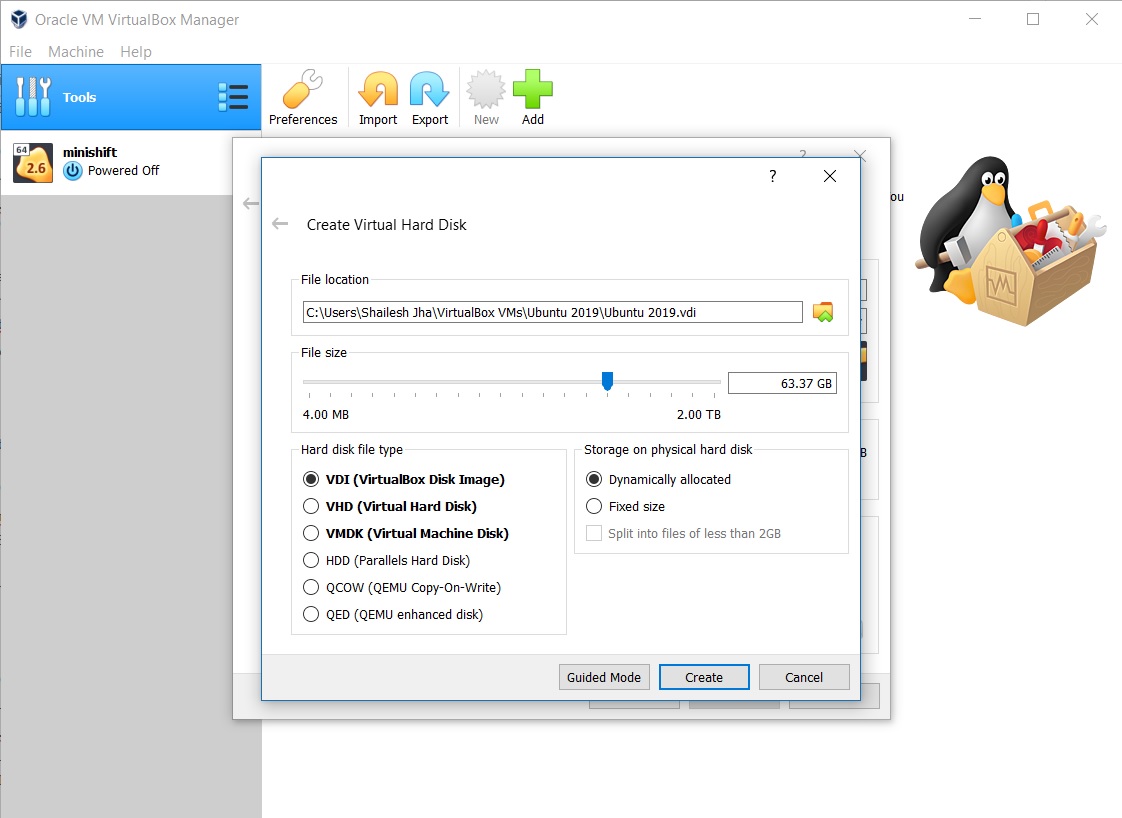
Now you will have to specify the disk space to allocate. I specify around 60 GB. Drag the slider to specify the disk space. Leave the rest as default. Click Create to continue.
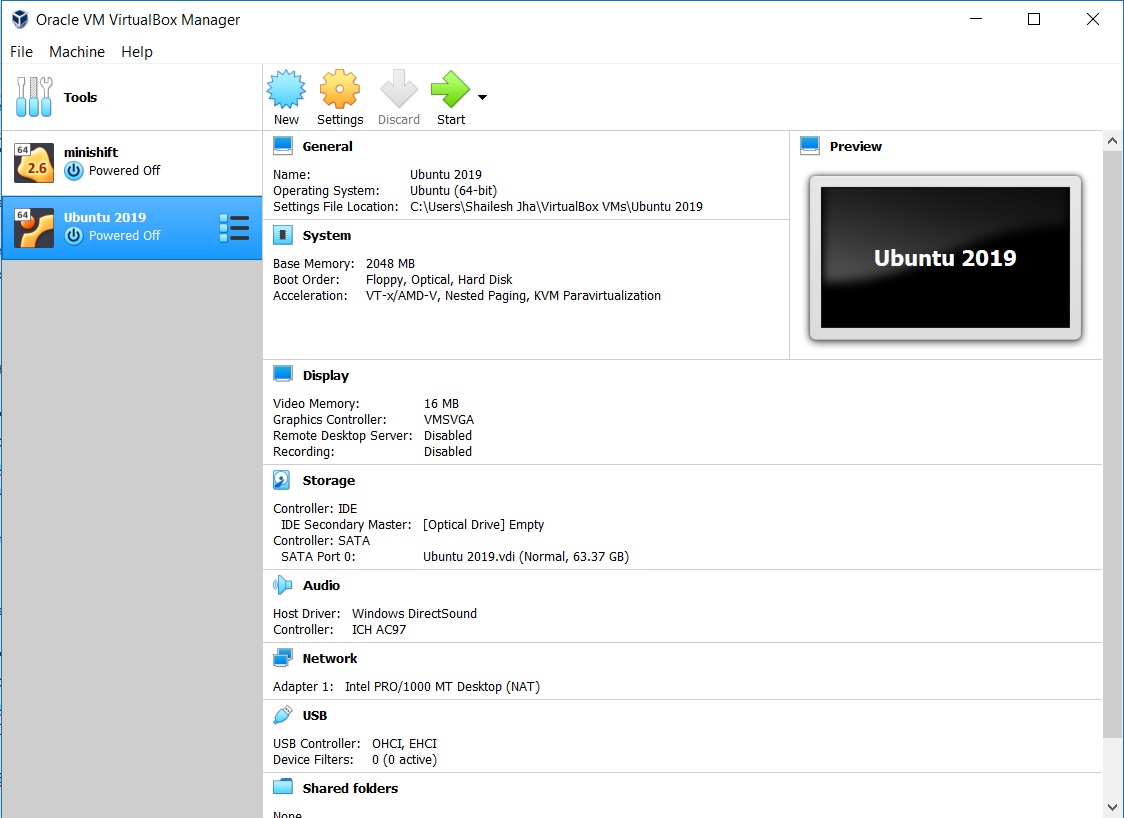
Now you will see the VirtualBox manager screen with the VM created.
Step 5 – Change Virtual machine settings
Now we will have to change the virtual machine settings. Click on the settings.
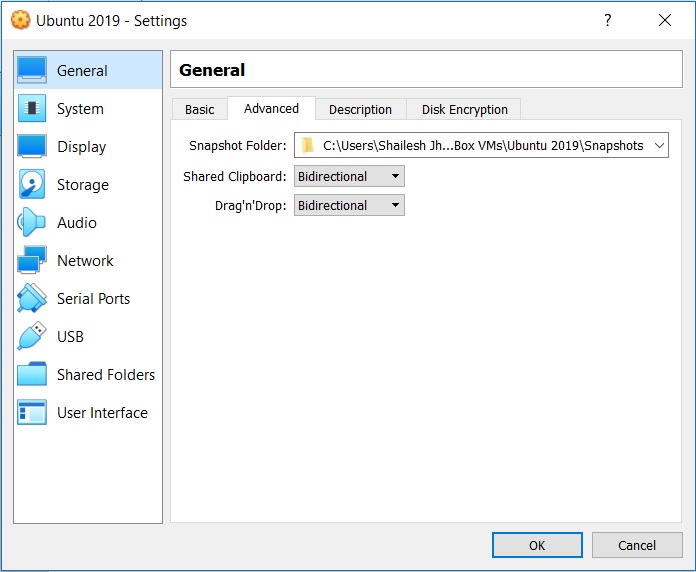
In the settings dialog box make the following changes:
- Go to General -> Advanced tab – Change Shared clipboard and Drag’n’Drop to bidirectional.
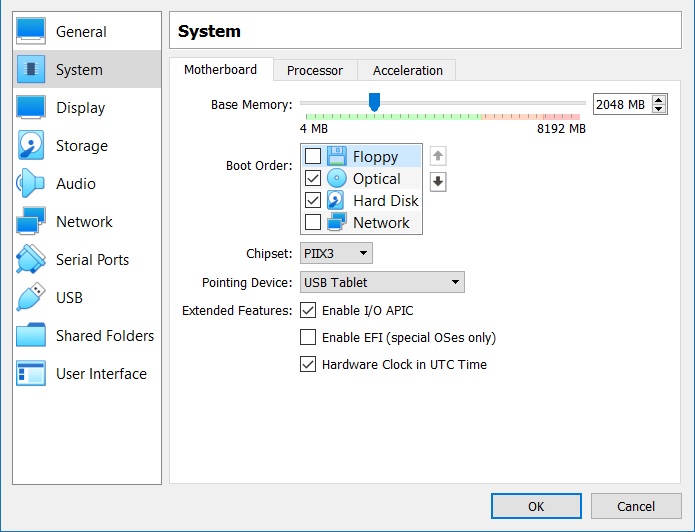
- Go to System -> Motherboard tab – Uncheck floppy.
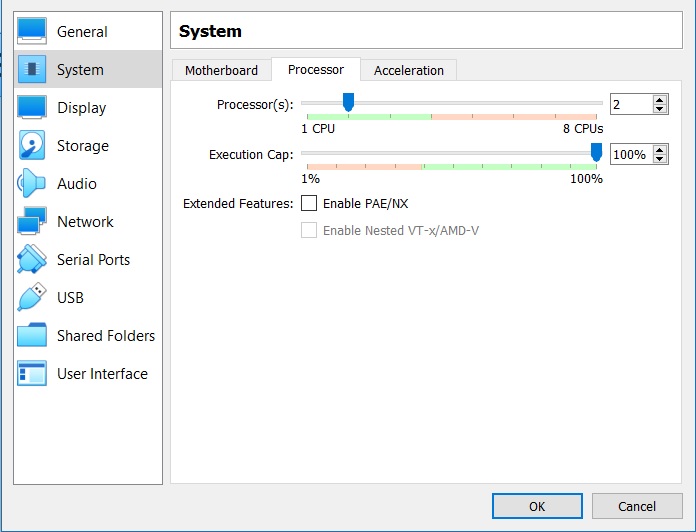
- Go to System -> Processor tab – Increase number of processors to 2 have better performance. You can leave it as it is if you want. leave rest of the settings as it is.
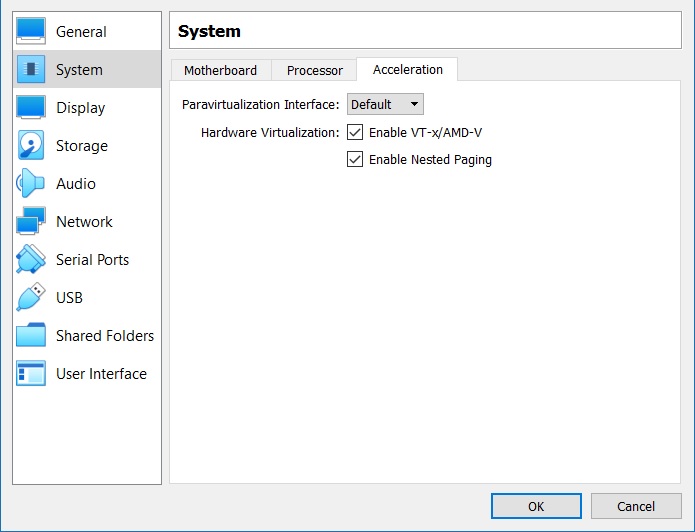
- Go to System -> Acceleration tab – Default settings are Enable VT-x/AMD-V checked and Enable nested paging checked.
leave them as it is. If you dont want to use VT-x/AMD-V, you can uncheck it, but there is no harm in using it if your CPU supports Intel VT-x or AMD-V.
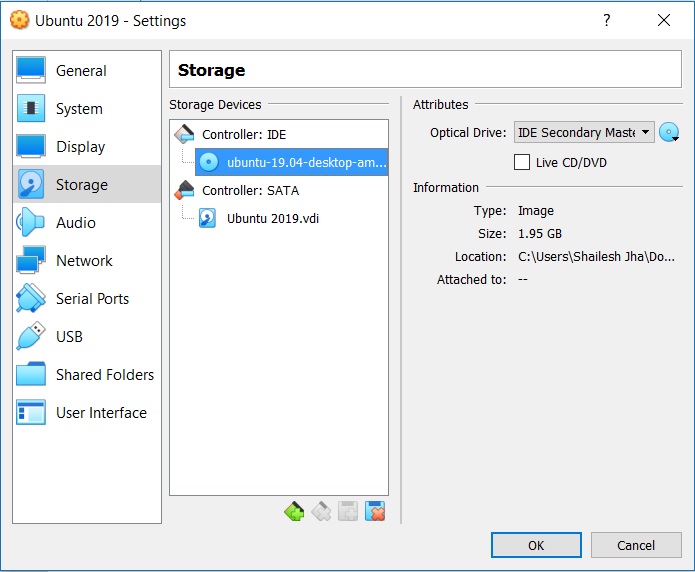
- Go to Storage-> Optical Drive attribute – Click on the disk Icon and select Choose Virtual optical Disk file and navigate to the ISO image that you have downloaded.
- Click OK to exit settings and return to VirtualBox Manager screen.
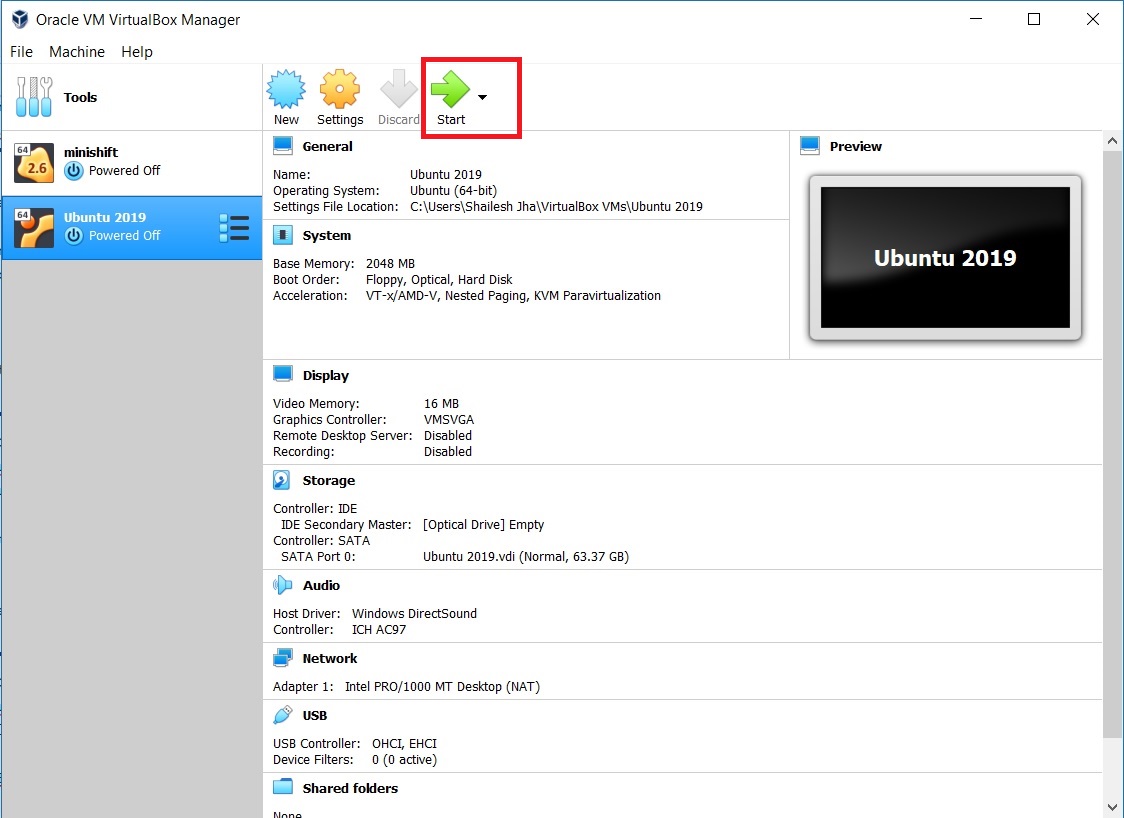
Step 6 – Click on the Start Icon to start the virtual machine
This will power on the virtual machine and the installation process will start.
Step 7 – Ubuntu VM start
Now you will see that the Virtual Machine will start in a new window. It will boot and you will see the install options.
After the VM boots, you will see the option to install Ubuntu
Click On Install Ubuntu to proceed. You can select the language here. I will go with English.
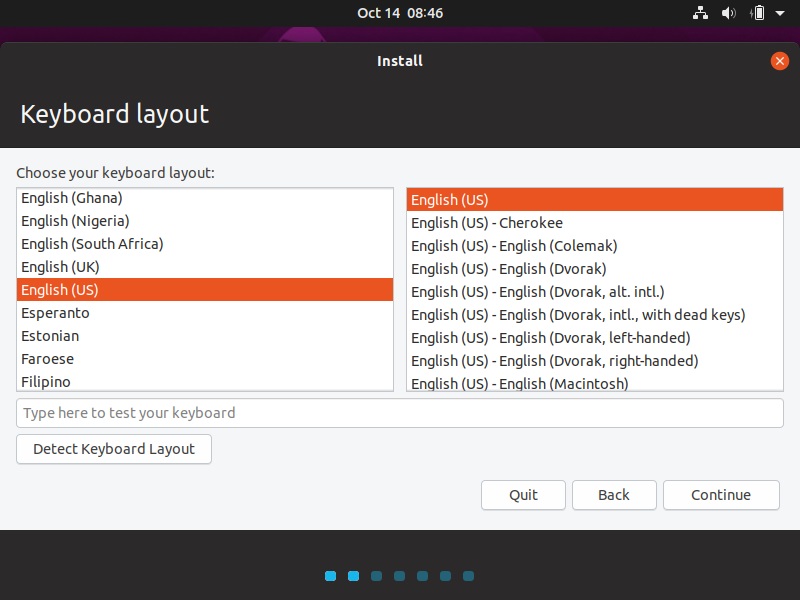
Step 8 – Ubuntu Installation – Choose Keyboard layout
In this screen you will be asked to select the Keyboard Layout. Choose the layout you want by clicking on it. I will go with the default and click on continue.
Step 9 – Ubuntu Installation – Update and other Software option
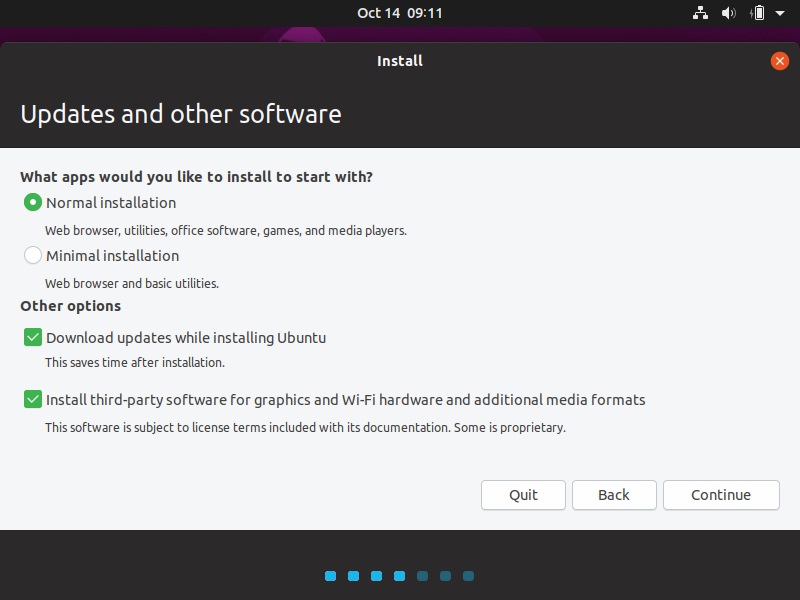
here you will have the option to select what kind of installation you want. I will choose Normal installation where all the features will be installed. If you select minimal, only the basic components will be installed and you will have to install software as and when required. I will go for normal install.
In other options, I also select “Install third-party software for graphics and Wi-Fi hardware and additional media formats.”
I normally select “Download updated while installing Ubuntu”. Since I am on a high internet connection, it works for me. You can uncheck this option if you are on a low internet connection speed.
Click Continue to proceed
Step 10 – Ubuntu Installation – Select Installation type
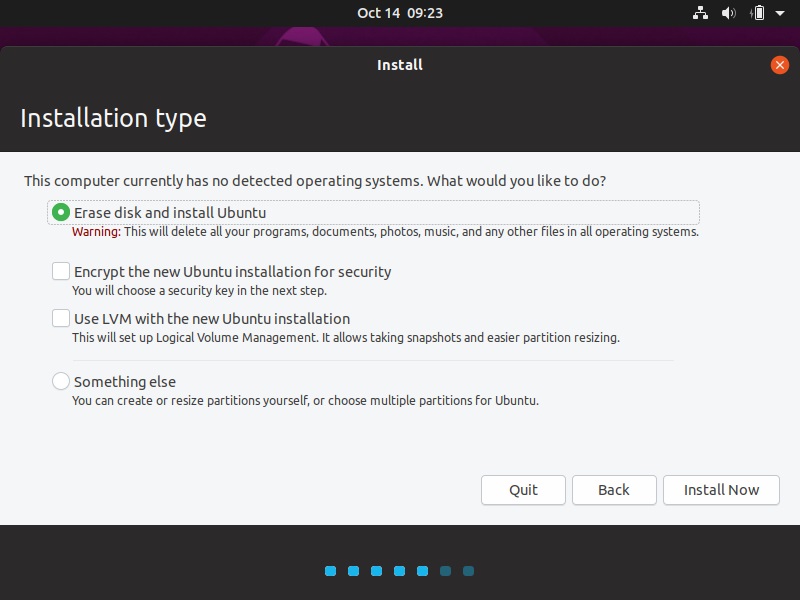
In this screen you will have to setup installation type. Leave the default setting as it is which is Erase Disk and install Ubuntu.
I dont select encryption and LVM because, I will be using Ubuntu for my personal use where I will be the admin. These options makes sense when you install Ubuntu in the corporate environment.
Click on Install now to start the installation
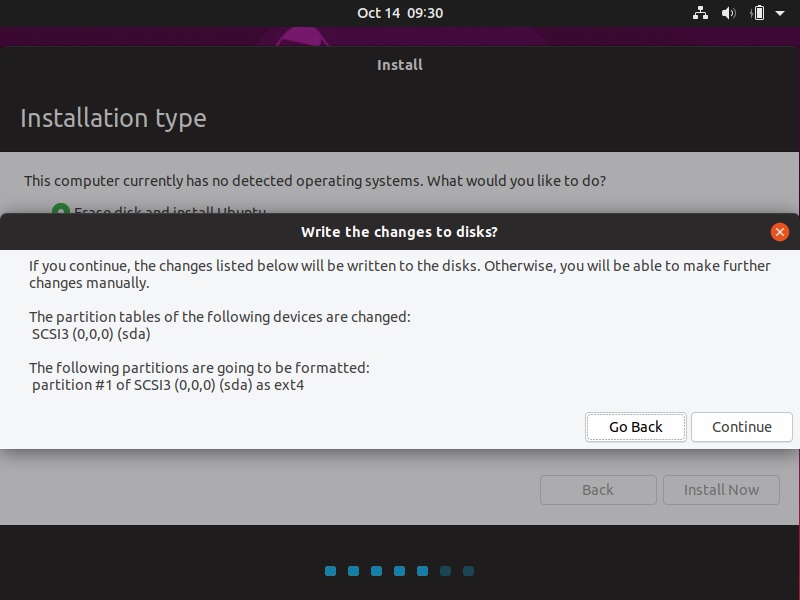
Step 11 – Ubuntu Installation – Write changes to disk
This is more of a warning message. After this the installation will start. If you want to make some changes in the earlier steps, click on Go Back.
Click on continue. This is begin the process of creating the Virtual disk and the installation process.
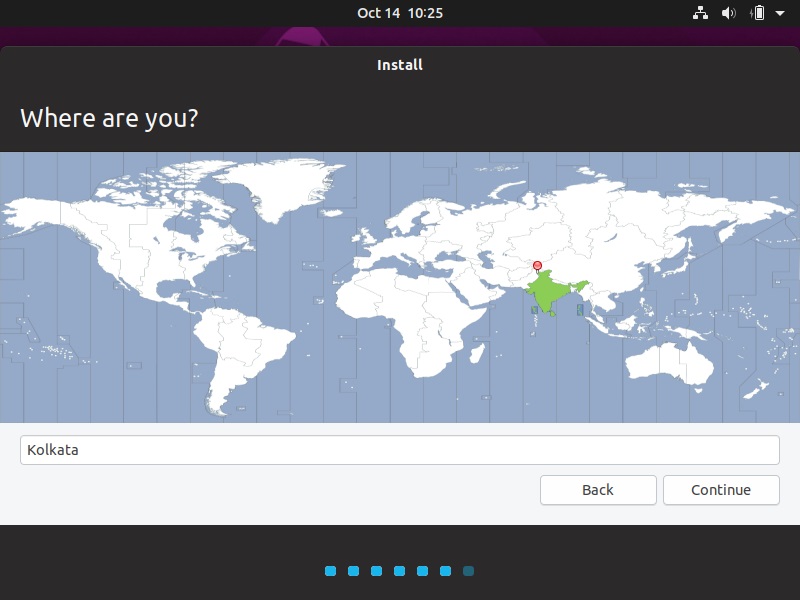
Step 12 – Ubuntu Installation – Setup time zone
Now you will asked to select the timezone. You can click on the map or type in the text box. Clicking on the map is easier.
Click Continue
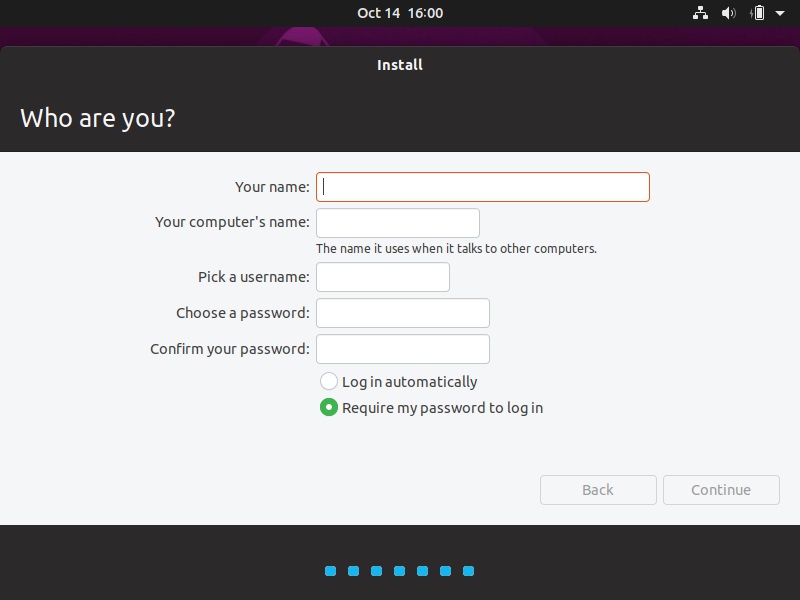
Step 13 – Ubuntu Installation – Setup username and password
Here you have to setup your username and password. Go ahead and fill in the details and click continue
Step 14 – Ubuntu Installation in progress
That’s it, wait for the for the installation to finish.
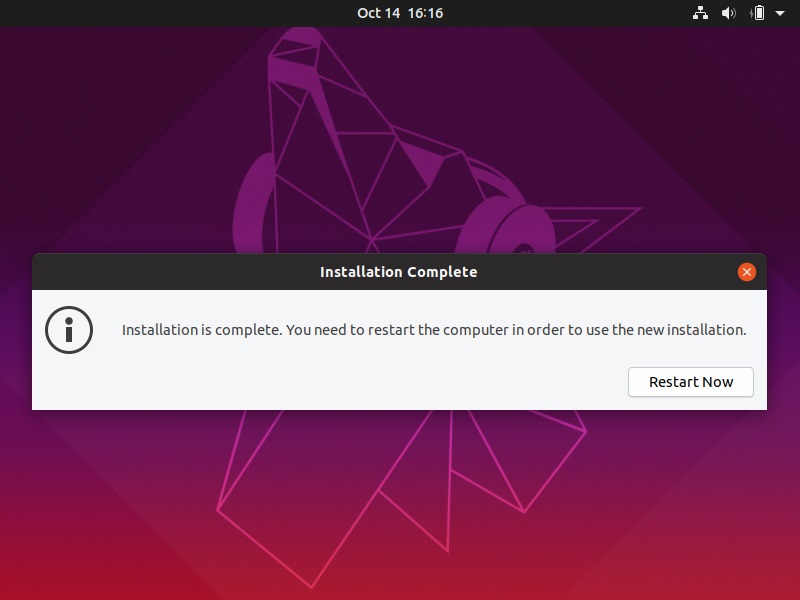
Once the installation completes, you will be asked to restart. Click on restart now to continue.
Step 15 – Ubuntu Installation – Remove Installation media
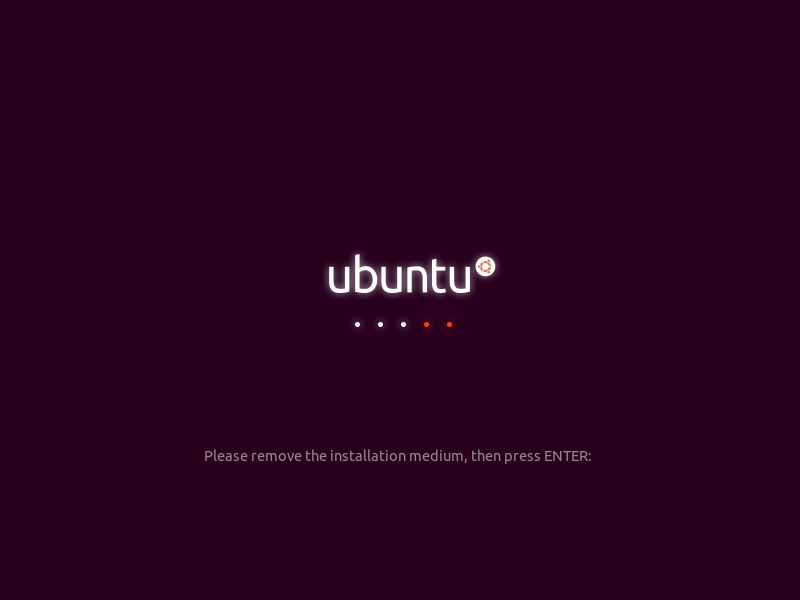
Now you will be asked to remove the installation media
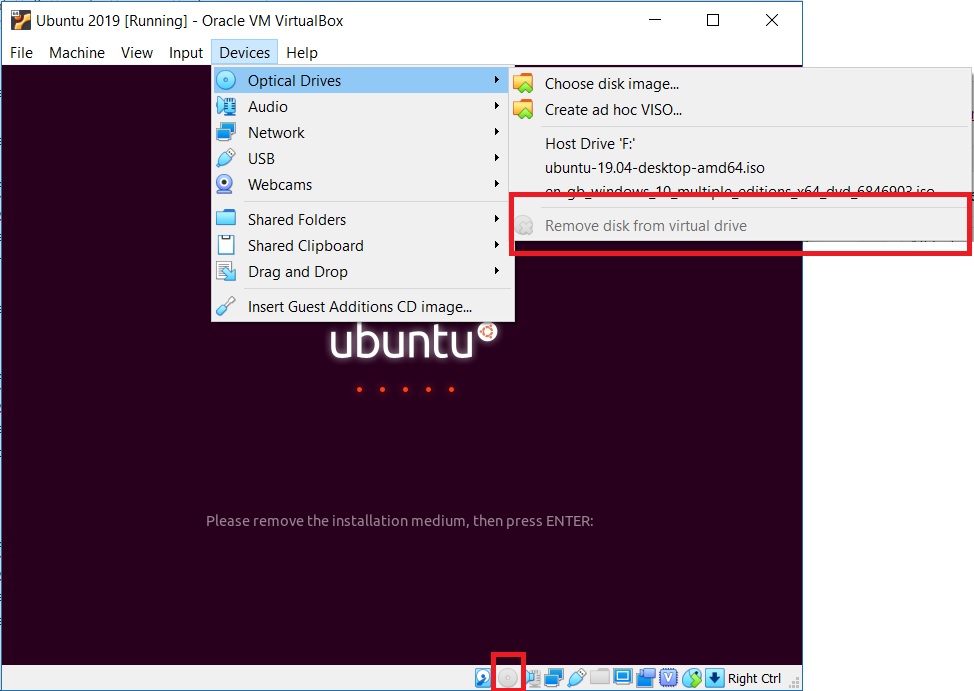
Before clicking Enter make sure that the ISO image is removed from the IDE device. To be sure
Click on Devices -> Optical media Remove disk from virtual drive is grayed out as shown in the screenshot below. Also at the bottom of the VirtualBox Window, you will see IDE icon as shown in the below screenshot. If it is grayed out, it means that the installation media has been removed. If not click on it, you will see the option to remove it.
In my case, at this stage, the disk was already removed by VirtualBox, as such this step of removing Installation media was not required.
Press Enter to continue…
Step 16 – Ubuntu Installation complete – login
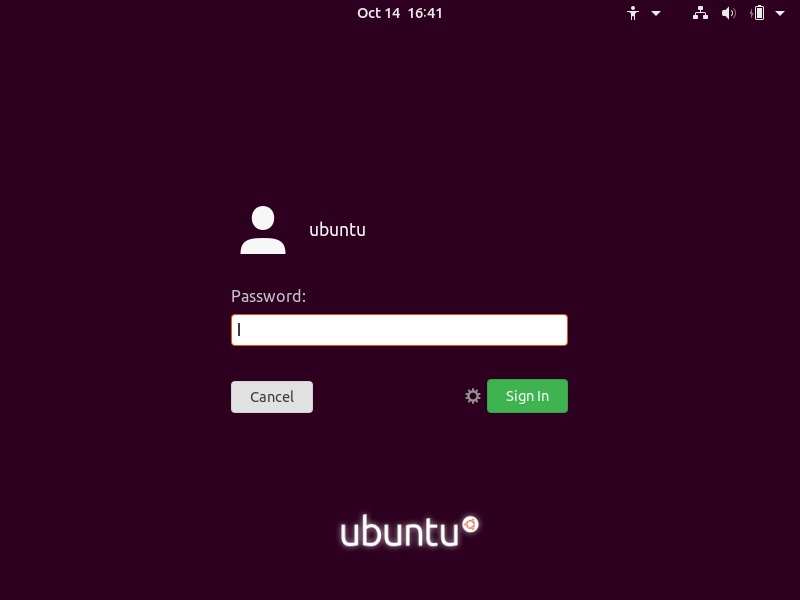
Wait for the VM to restart, you will see the login screen with your user name that you setup earlier. Click on the user name to enter your password.
Step 17 – That it, all done
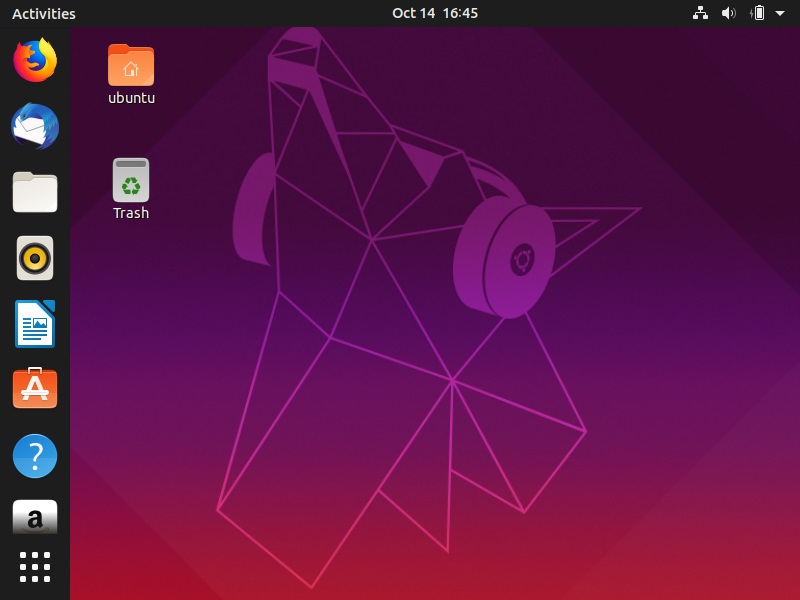
Now you see the Ubuntu desktop, you are done.
There is one last step though. You wont be able to switch to full screen mode.
Step 18 – Enable full screen mode – Install VirtualBox Guest Editions
By default, you will not be able to switch to fill screen mode. To enable full screen mode, the following steps needs to be taken.
- Insert Guest Edition CD Image
From the menu bar go to – Devices -> Insert Guest Edition CD Image.
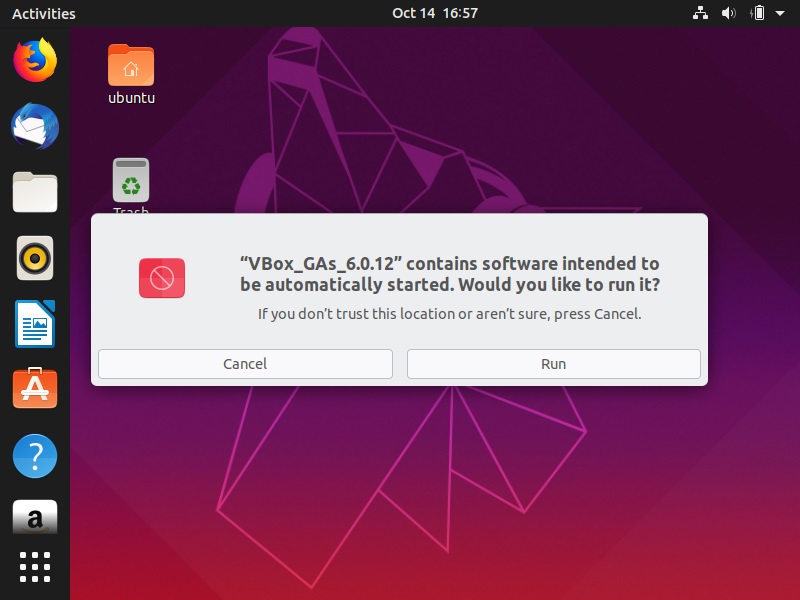
- Software installation warning
Now you will see a warning, click run.
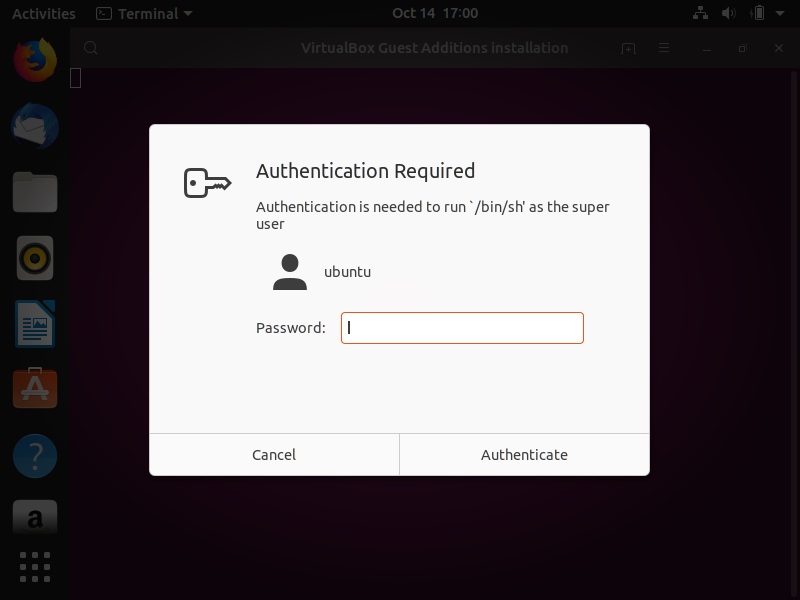
- Enter admin password
You will asked to enter your admin password. It would be the same as the one you setup during the installation process.
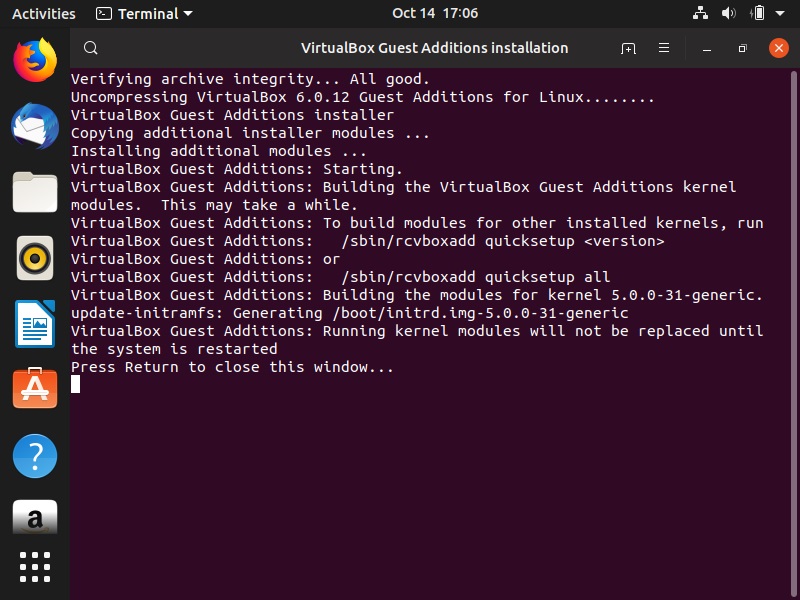
- VirtualBox Guest Edition installation begins
Wait for the process to complete. When the process completes, you will see “Press return to close this window”. Hit enter to complete the process.
- Reboot VM
For the changesto take effect, you need to restart your VM by going toMachine -> Rest
Process Complete
You are done, You can start working on Ubuntu 2019 in full screen mode in VirtualBox by going to View -> Full screen mode. Thanks for Visiting my blog.
