In this blog post, I will show you how to setup Kali Linux 2020 using official images made available from Kali Linux. These custom images can be directly deployed on VirtualBox, VMware Workstation, VMware Player and Hyper-V.
Some people face a lot of problem while installing Kali Linux using the official ISO image in VMware and VirtualBox. To skip these problems, best way is to use the official custom Kali Images made available for VMware and VirtualBox
If you want to install Kali Linux using ISO images, please follow my post
- How to install Kali Linux 2020.2 in VMware Workstation Player 15
- How to install Kali Linux 2020.2 in VirtualBox 6
- How to Install and Setup Kali Linux 2020.2 in Hyper-V on Windows Operating System
Contents of the Post
This being a long post, please use the below link to navigate directly to the desired section.
- How to install Kali Linux 2020.2 in VirtualBox 6 using Kali Linux VirtualBox Image
- How to install Kali Linux 2020.2 in VMware Workstation 15 using Kali Linux VMware Image
- How to install Kali Linux in VMware Player 15 using Kali Linux VMware Image
- How to install Kali Linux 2019.4 in Hyper-V using Kali Linux Image Image
Please note that generally Kali Linux does not offer the latest version of the Kali Linux images for VirtualBox, VMWare and Hyper-V. Generally it is a at least one previous version that is available for download. The images are updated but with a delay. But this is not a rule. Latest version of Kali Linux Images may also be available.
So, to get it straight, you can use the Kali Linux images to setup Kali Linux and then update to the latest version later by logging into Kali Linux if the latest version of Kali Linux Image is not available.
How to install Kali Linux 2020.2 in VirtualBox 6 using Kali Linux VirtualBox image
Setting up Kali Linux in VirtualBox 6 using VirtualBox image is pretty straight forward. It involves downloading the image, and opening the virtual machine in VirtualBox.
In you have not installed VirtualBox 6 yet, please refer to my blog here.
Below are the steps.
Step 1 – Download the Kali Linux VirtualBox Image
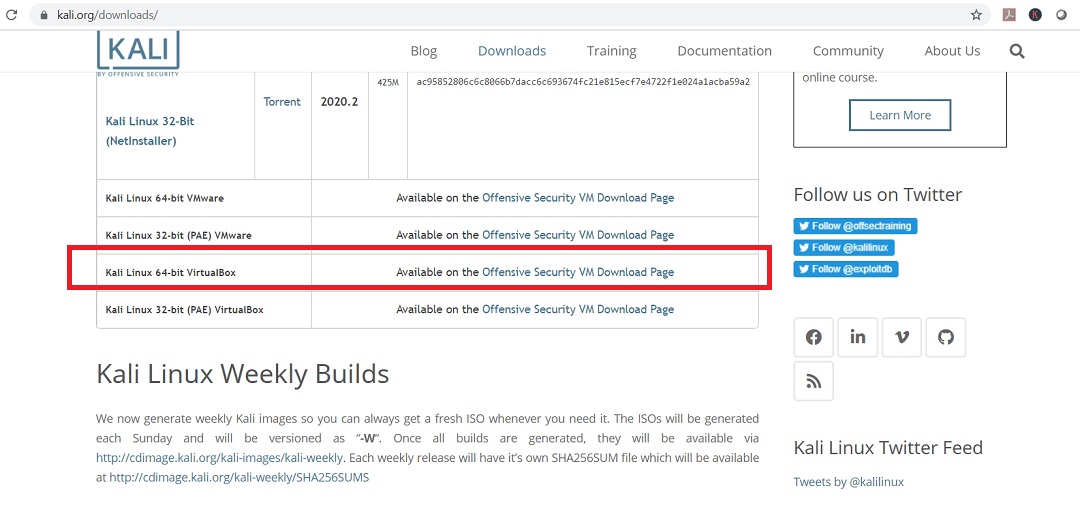
In the official download page, you will see the links for the page from where you can download the VirtualBox Images.
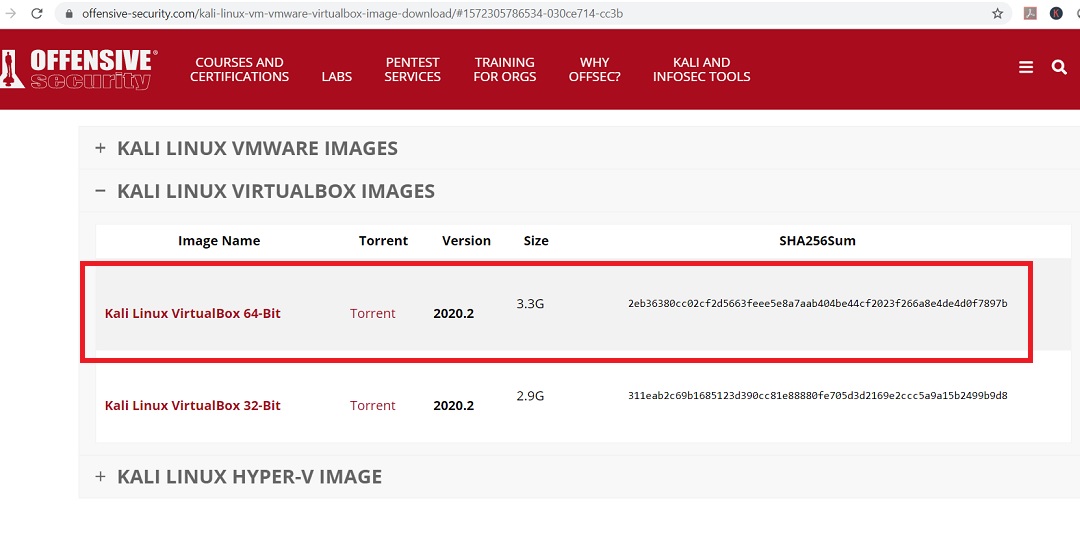
Or you can also get the images from the Kali Linux official custom image download page.
Download 32 or 64 bit version based on your system. I always use 64 bit version. The download size is around 3.3 GB. I recommend using torrent to download the file as it is much faster that direct download. The name of the downloaded file will be something like kali-linux-2020.2-vbox-amd64.ova.
Step 2 – Import Kali Linux image in VirtualBox
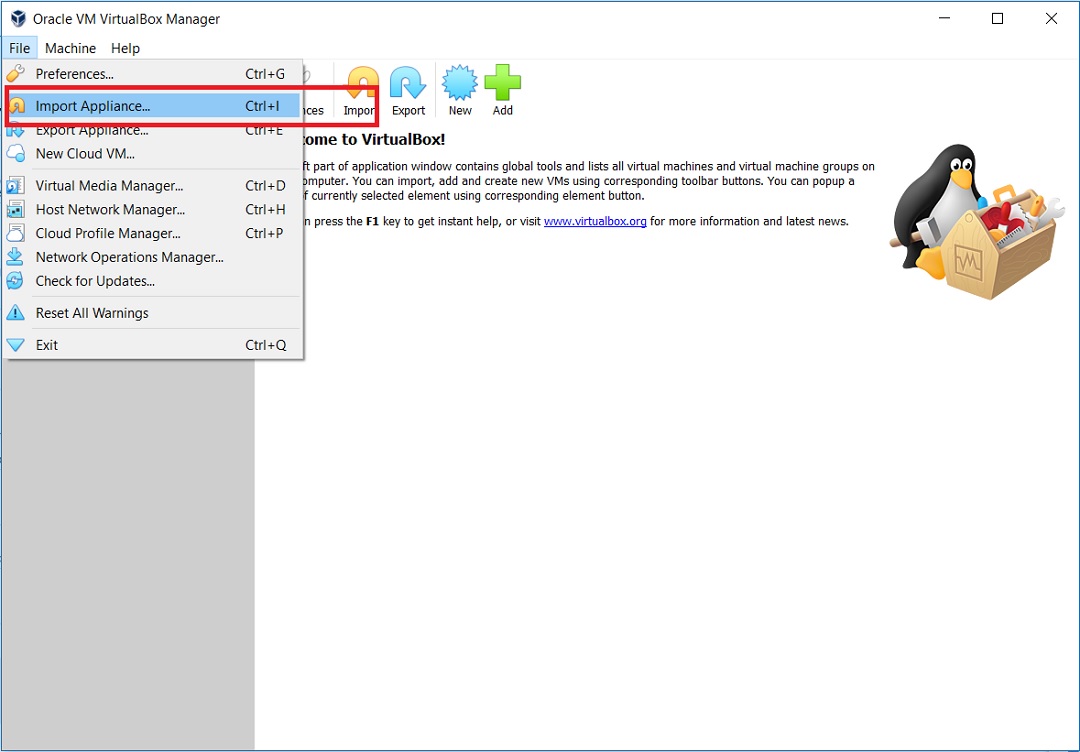
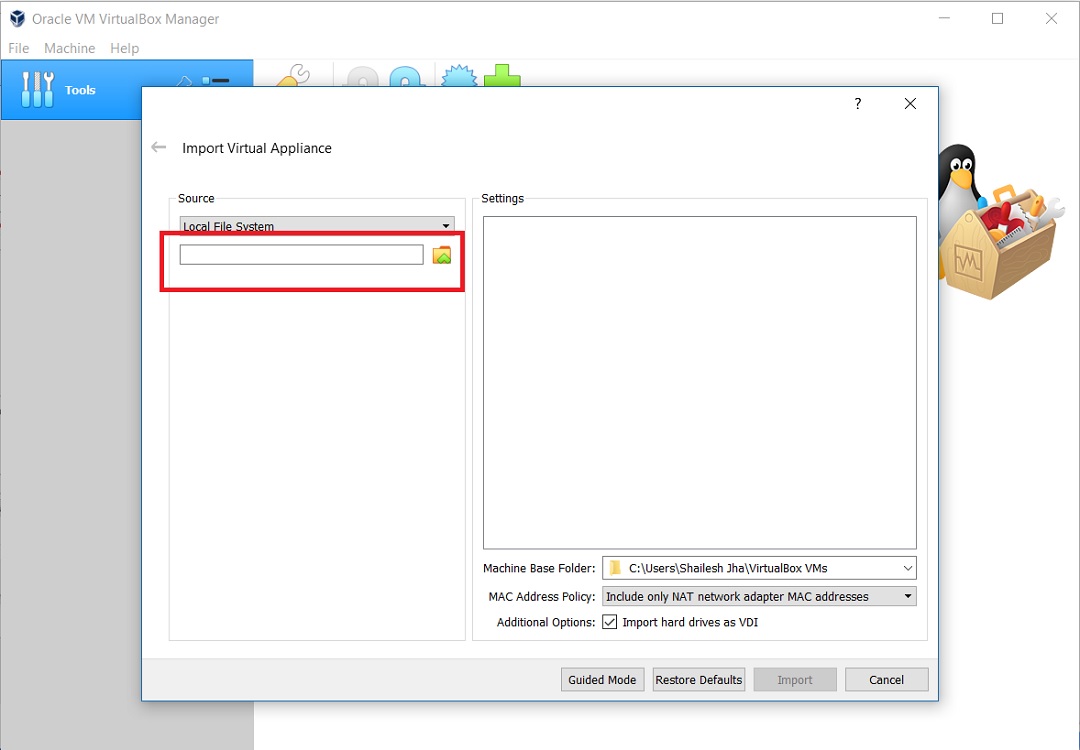
Open VirtualBox and go to File->Import Appliance to import the Kali Linux VirtualBox Image.
In Alliance to Import, browse to the folder where you have downloaded the .ova file. Select the file to open it.
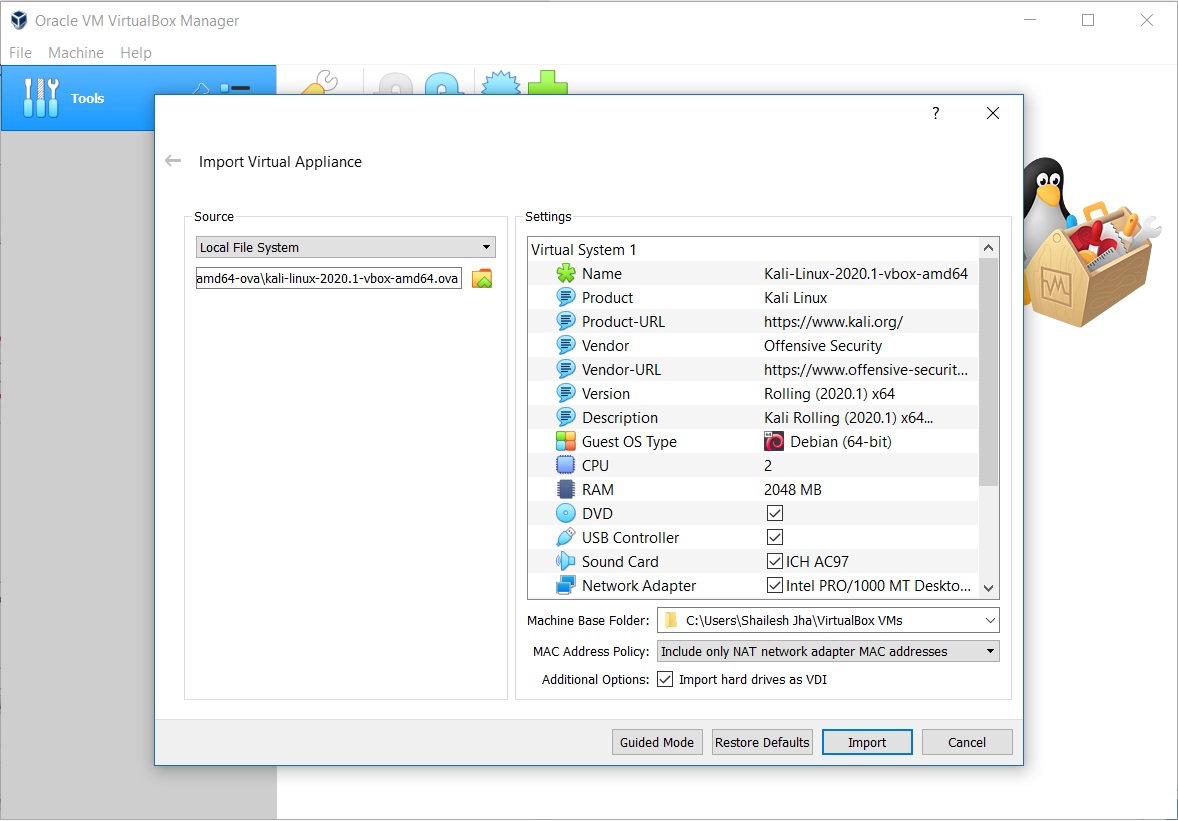
This will open the Kali Linux Image for VirtualBox and you will see the default for the VM. Click on Import to import the VM.
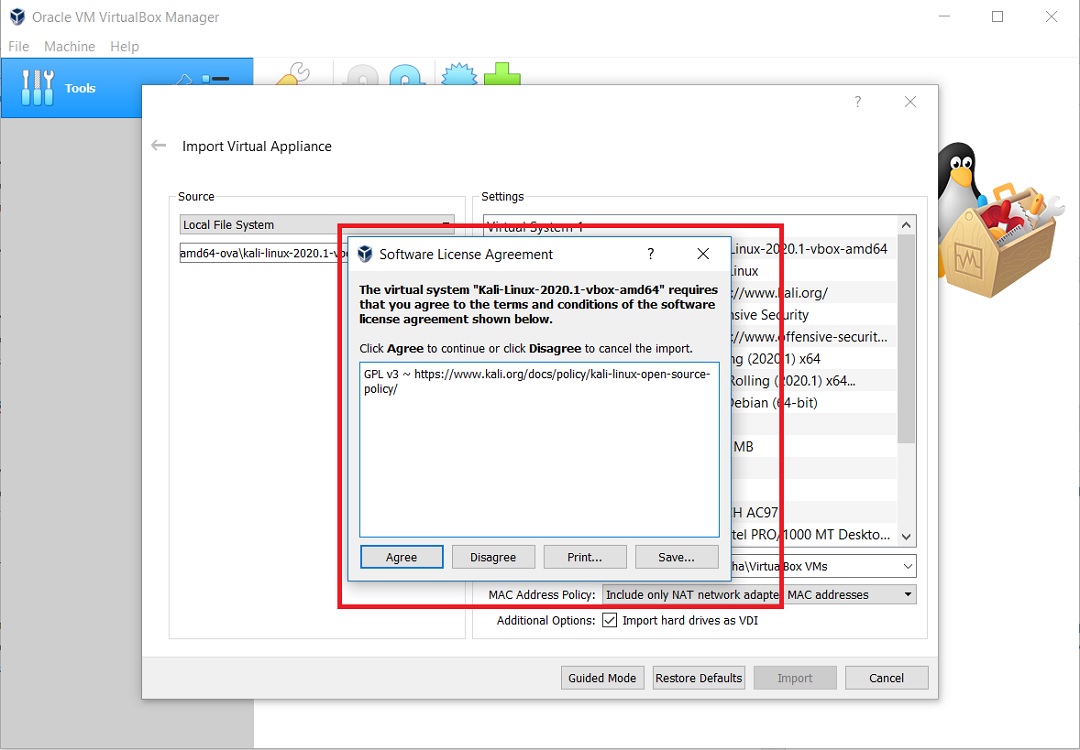
Now you will be asked to accept Kali Linux License Agreement. Click Agree to start the import process.
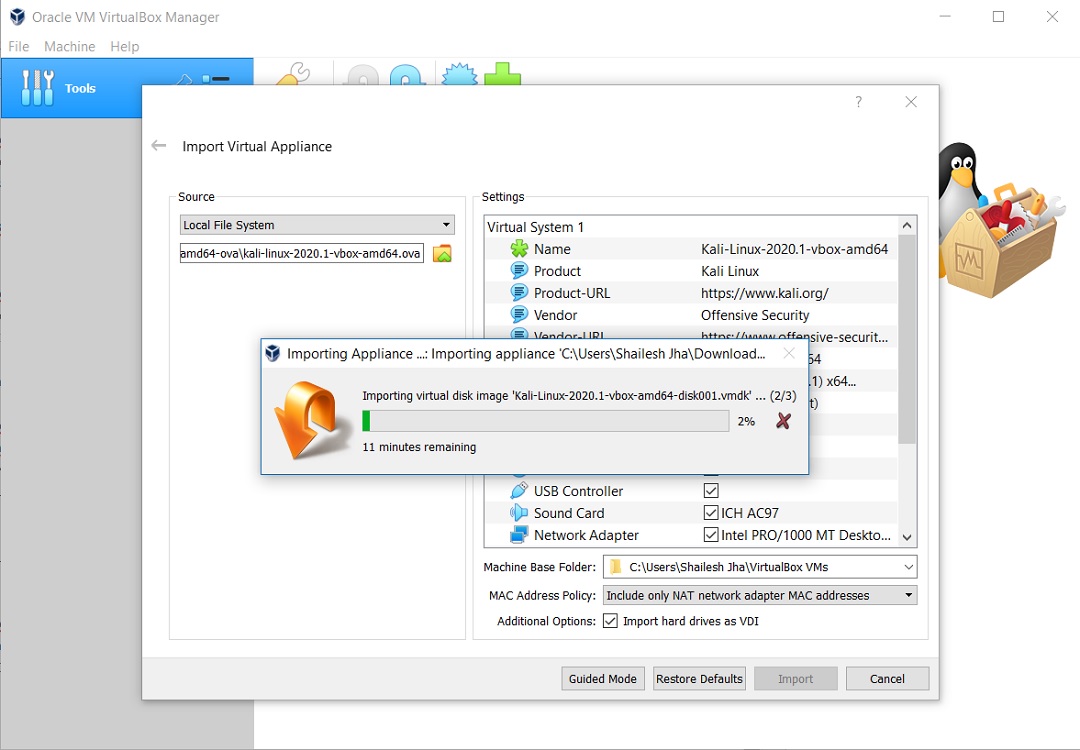
You will see that the import process begins. Wait for sometime for the process to complete.
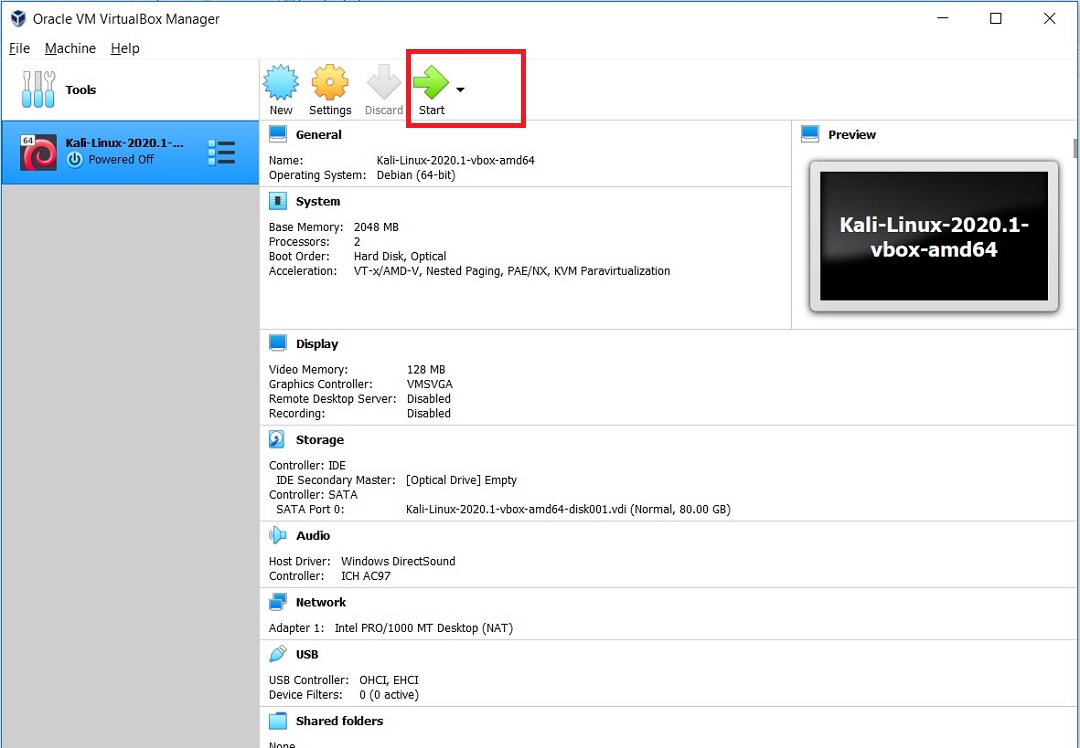
Once the Import completes you will see the Kali VM in VirtualBox manager. Click on Start to start the VM.
If you are getting any error while starting the VM, make sure that you have installed VirtualBox Extension pack.
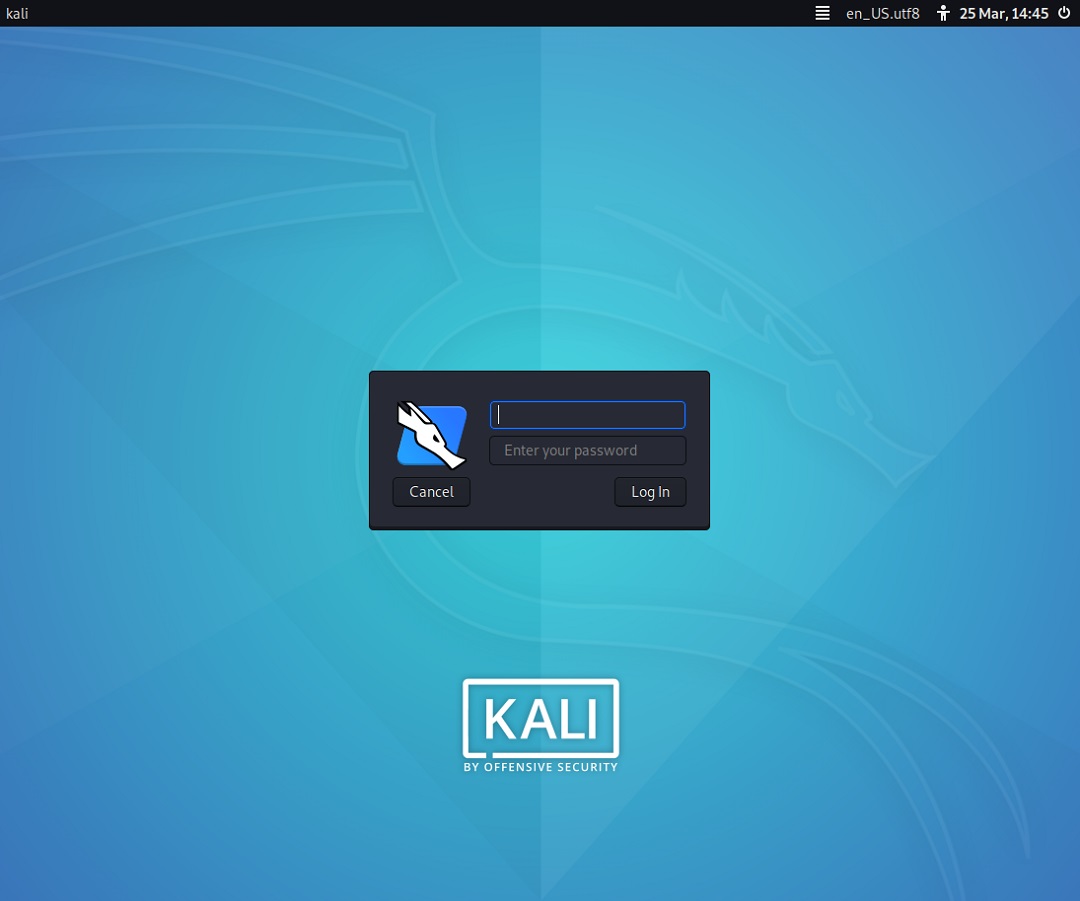
You will see the GRUB boot loader and after sometime, VM will start and you will see the login screen.
Login with User name – kali
Password – kali
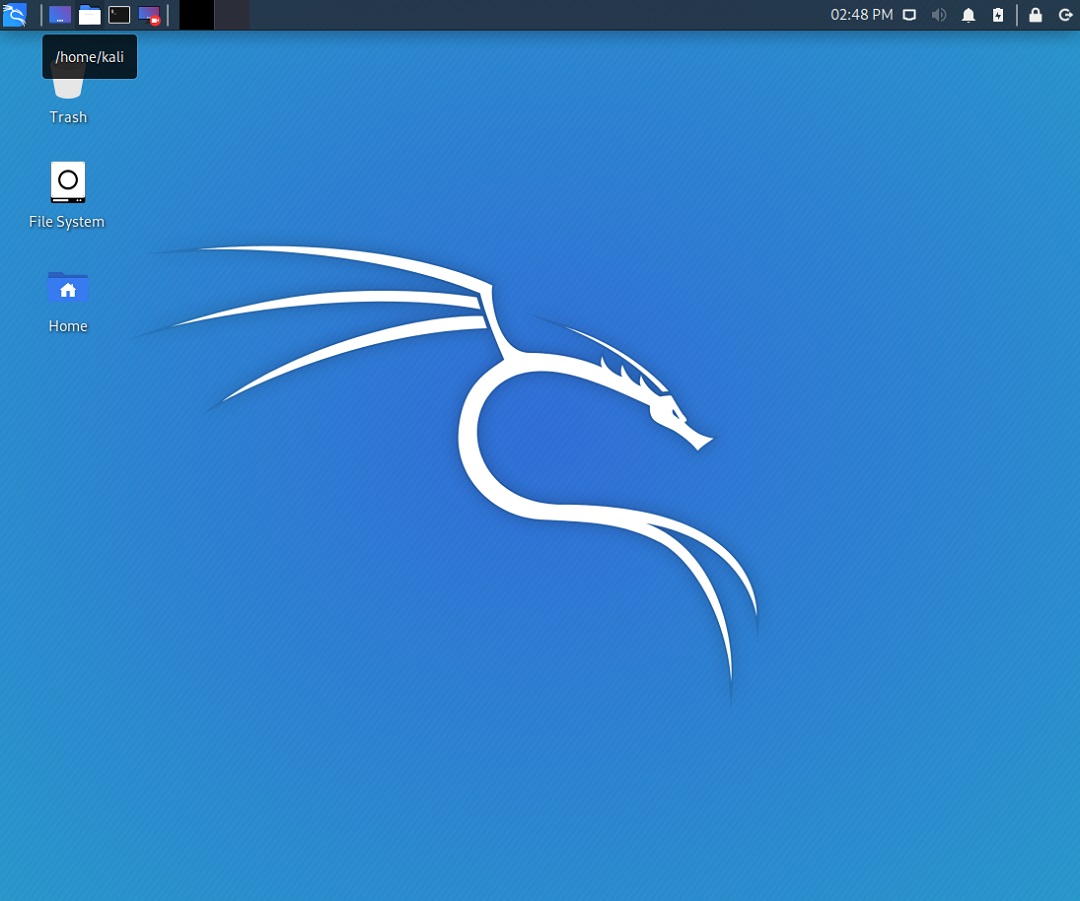
You will login to Kali Linux. That’s it, you are done. You dont have to install VirtualBox Guest Additions to switch to full screen mode. It is already installed as a part of the image. You can switch to full screen mode.
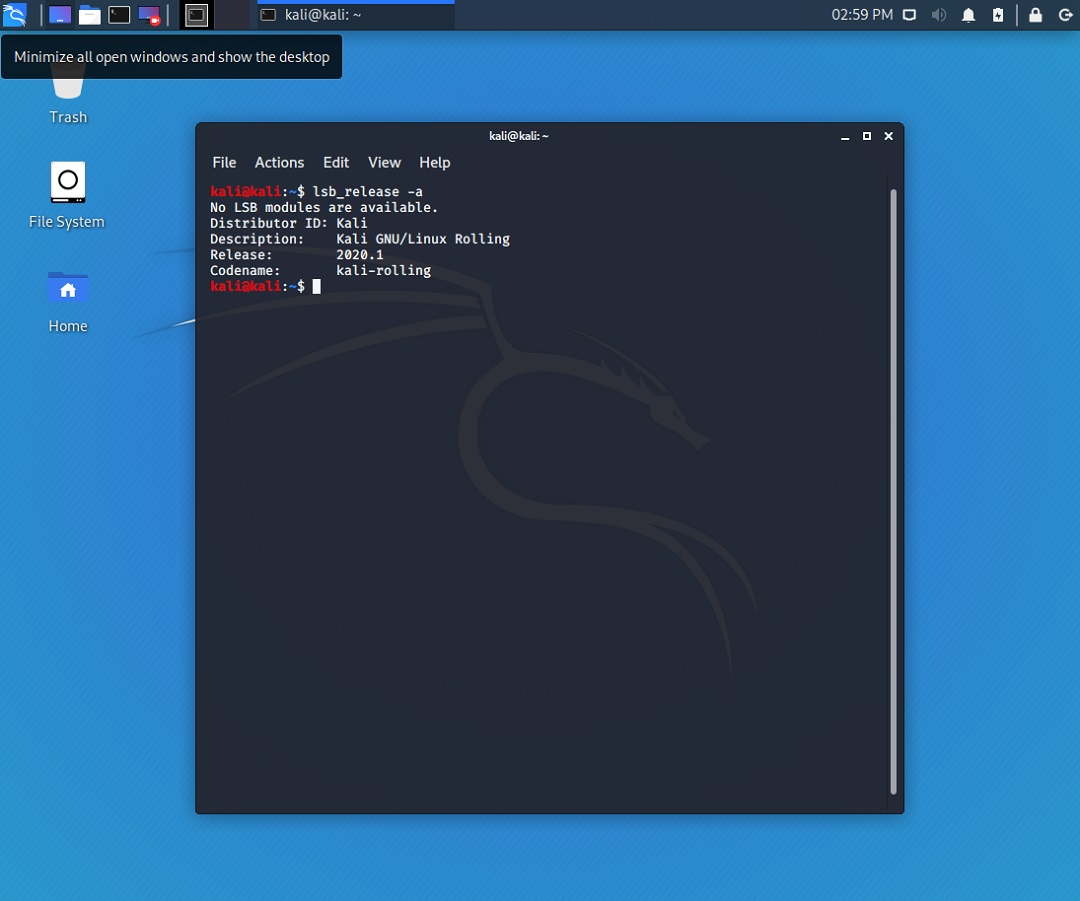
To check the version of Kali Linux Installed, open terminal and enter the command lsb_release -a. In the output, you will see the version.
How to install Kali Linux 2020.2 in VMware Workstation 15 using Kali Linux VMware Image
Setting up Kali Linux in VMware Workstation 15 using VMware image is pretty straight forward. It involves downloading the image, extracting the files and opening the virtual machine in VMware Workstation 15.
In you have not installed VMware Workstation 15 yet, please refer to my blog here.
Below are the steps.
Step 1 – Download the VMware Image
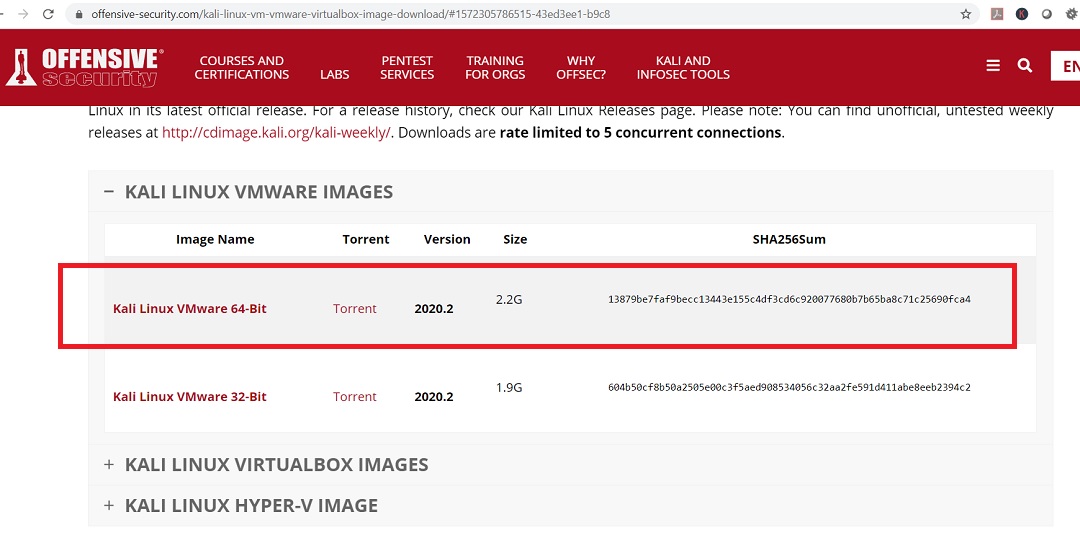
Kali Linux provides official images for VMware. This can be downloaded from Kali Linux official custom image download page.
Download 32 or 64 bit version based on your system. I always use 64 bit version. The download size is around 2.2 GB. I recommend using torrent to download the file as it is much faster that direct download. The name of the downloaded file will be something like kali-linux-2020.2-vmware-amd64.7z. Its an archive file
Step 2 – Extract the downloaded file
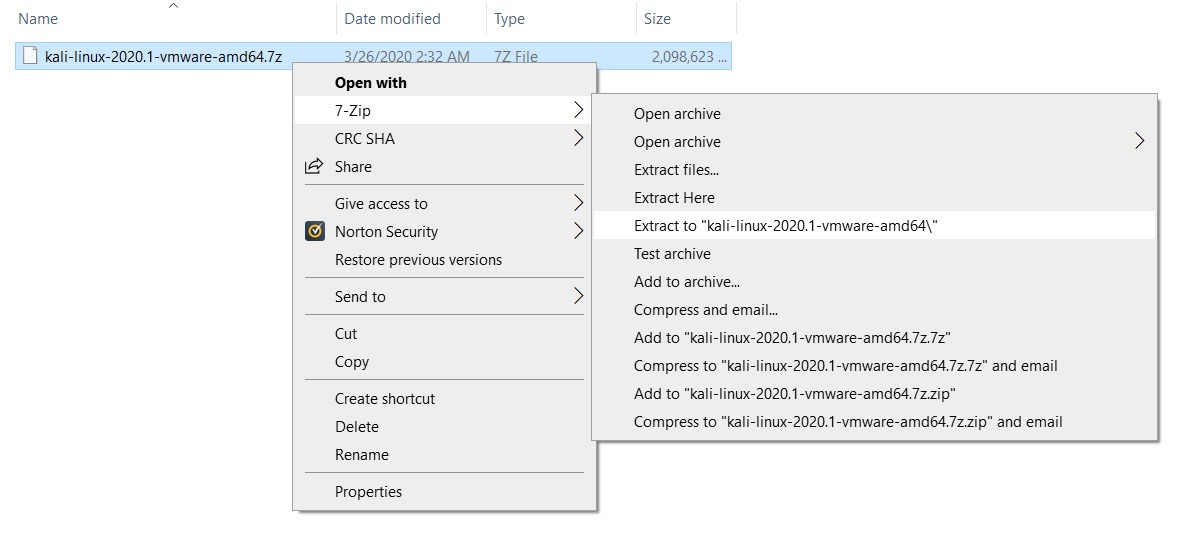
7.zip utility tool can be used to extract the downloaded file. Please note that disk space required to extract the file is around 10.5 GB. Make sure that you have sufficient disk space.
Step 3 – Open Kali Linux image in VMware Workstation
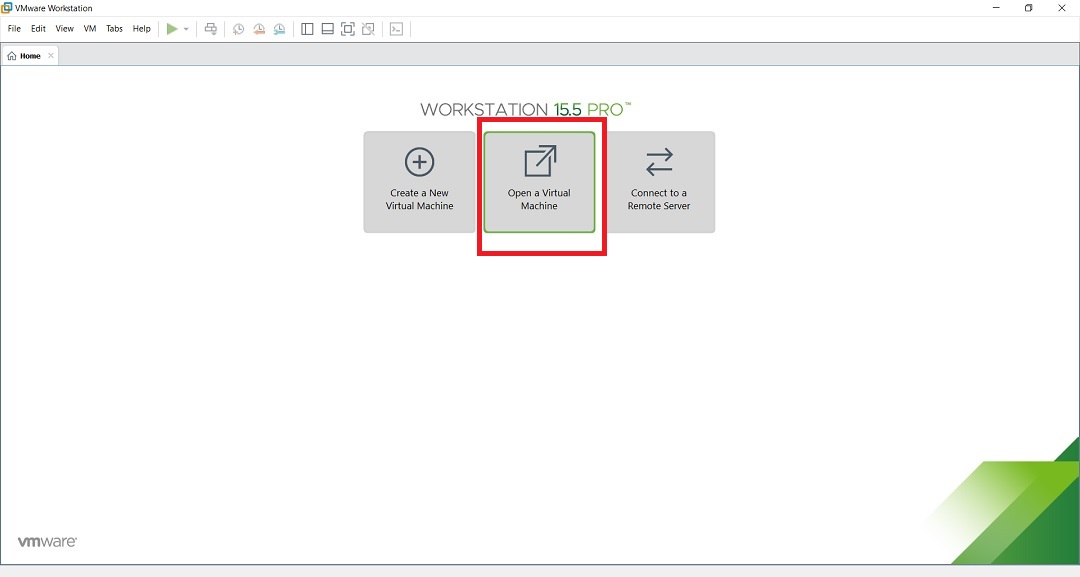
In VMware workstation, click on Open a Virtual Machine or go to File-> Open.
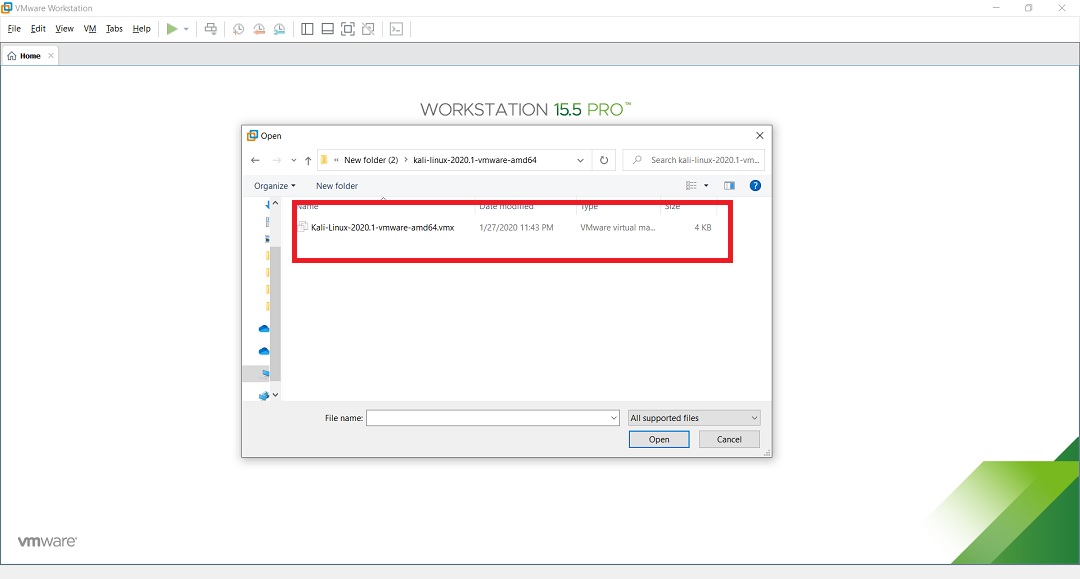
Select the .vmx file from the folder in which you have extracted the kali linux image files. The name of the file will be something like this Kali-Linux-2020.1-vmware-amd64.vmx
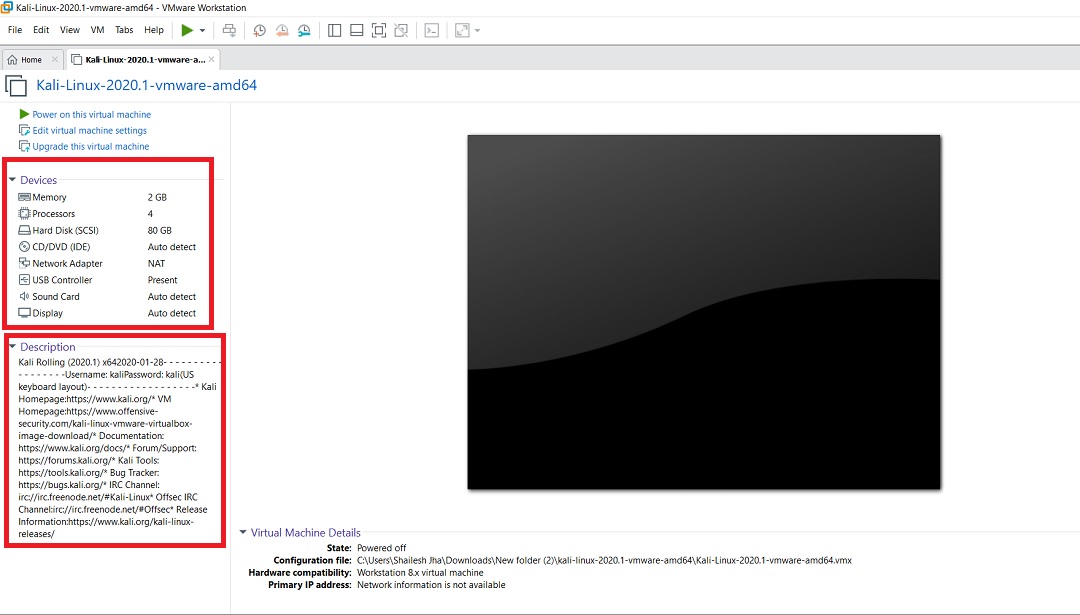
Once you open the file, you will see something like this. In the below screenshot, you can see in the description box, user name and password. Also, you can see by default, allocated RAM is 2 GB, 4 Processor and 80 GB hard disk. Normally. I leave this as it is – the default.
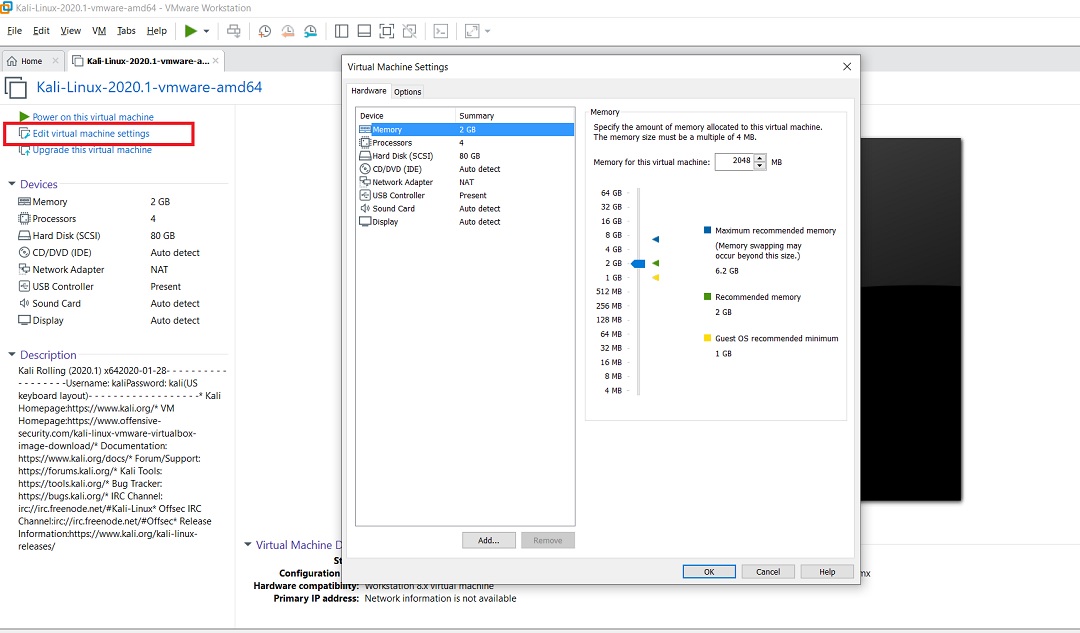
If you want to change the default, you can click on Edit virtual machine settings and make changes based on your preference.
Step 4 – Open Kali Linux VM
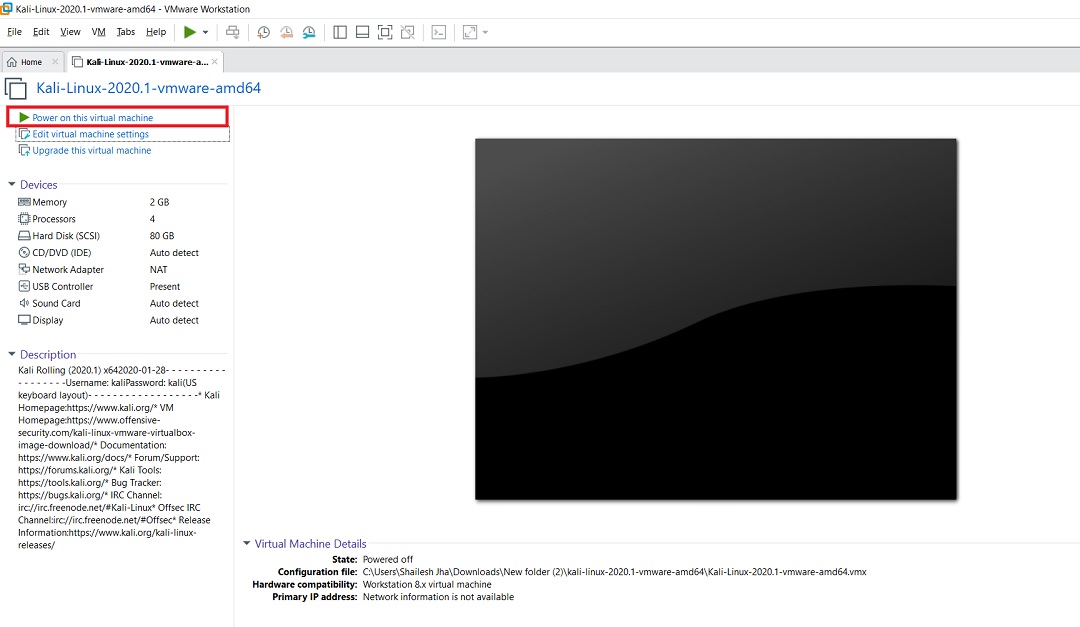
Click on Power on this virtual machine to start the VM.
You will see a dialog box asking you if you have moved or copied the VM. Click on I copied it to continue.
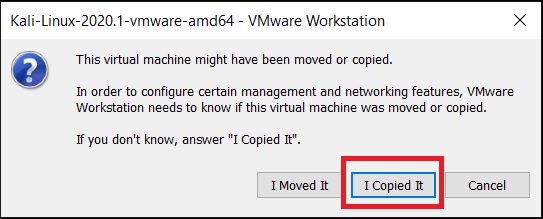
Kali Linux VM -Moved Or Copied
You will see the GRUB boot loader and after sometime, VM will start and you will see the login screen.
Login with User name – kali
Password – kali
You will login to Kali Linux. That’s it, you are done.
To check the version of Kali Linux Installed, open terminal and enter the command lsb_release -a. In the output, you will see the version.
How to install Kali Linux 2020.2 in VMware Player 15 using Kali Linux VMware Image
Setting up Kali Linux in VMware Player 15 using VMware image is pretty straight forward. It involves downloading the image, extracting the files and opening the virtual machine in VMware Player 15.
In you have not installed VMware Player 15 yet, please refer to my blog here.
Below are the steps.
Step 1 – Download the VMware Image
Kali Linux provides official images for VMware. This can be downloaded from Kali Linux official custom image download page.
Download 32 or 64 bit version based on your system. I always use 64 bit version. The download size is around 2.1 GB. I recommend using torrent to download the file as it is much faster that direct download. The name of the downloaded file will be something like kali-linux-2020.2-vmware-amd64.7z. Its an archive file
Step 2 – Extract the downloaded file
7.zip utility tool can be used to extract the downloaded file. Please note that disk space required to extract the file is around 10.5 GB. Make sure that you have sufficient disk space.
Step 3 – Open Kali Linux image in VMware Player
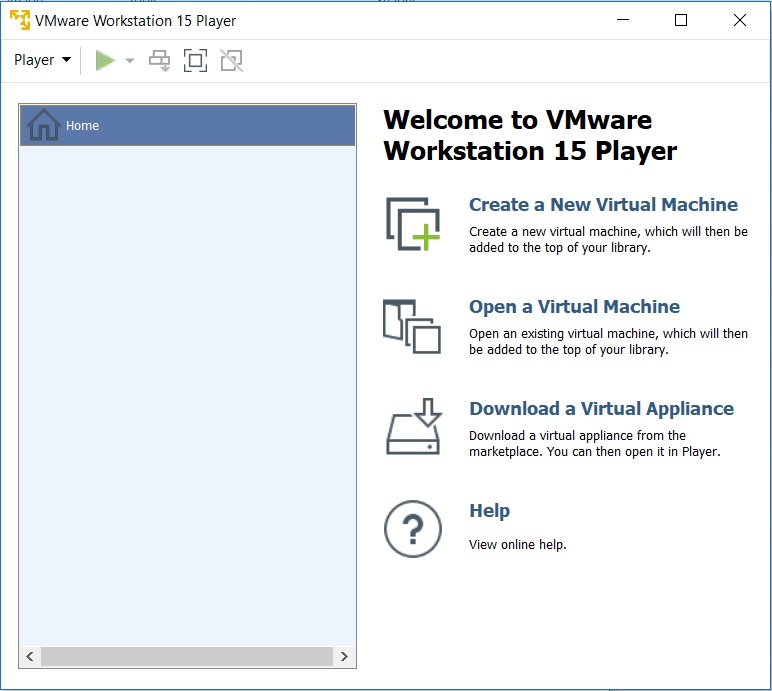
In VMware workstation Player 15, click on Open a Virtual Machine
Select the .vmx file from the folder in which you have extracted the kali linux image files. The name of the file will be something like this Kali-Linux-2020.1-vmware-amd64.vmx
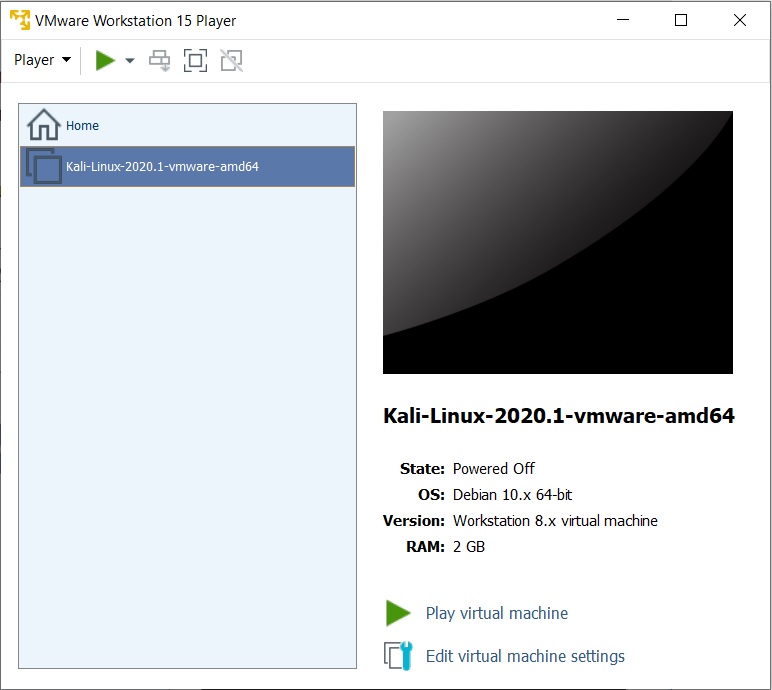
Once you open the file, you will see something like this.
By default, allocated RAM is 2 GB, 4 Processor and 80 GB hard disk. Normally. I leave this as the default. if you want to change them, you can click on Edit virtual machine settings and make changes based on your preference.
Step 4 – Play Kali Linux VM
Click on Play virtual machine to start the VM. You will see a dialog box asking you if you have moved or copied the VM. Click on I copied it to continue.

Kali Linux VM -Moved Or Copied
You will see the GRUB boot loader and after sometime, VM will start and you will see the login screen.
Login with User name – kali
Password – kali
You will login to Kali Linux. That’s it, you are done. You dont have to install VMware tools to switch to full screen mode. It is already installed as a part of the image. You can switch to full screen mode.
To check the version of Kali Linux Installed, open terminal and enter the command lsb_release -a. In the output, you will see the version.
How to install Kali Linux 2019 using Kali Linux Hyper-V image
As of the day of writing of this blog, Kali Linux has provided image for version Kali Linux 2019.4 for Hyper-V. For VMware and VirtualBox, the image is available for Kali Linux Version 2020.1.
You will have to enable Hyper-V in Windows to use it. If you have not done it, Please follow my post Step by Step Guide to Enable, Install, Setup and Configure Hyper-V in Windows 10
Step 1 – Download Hyper-V image
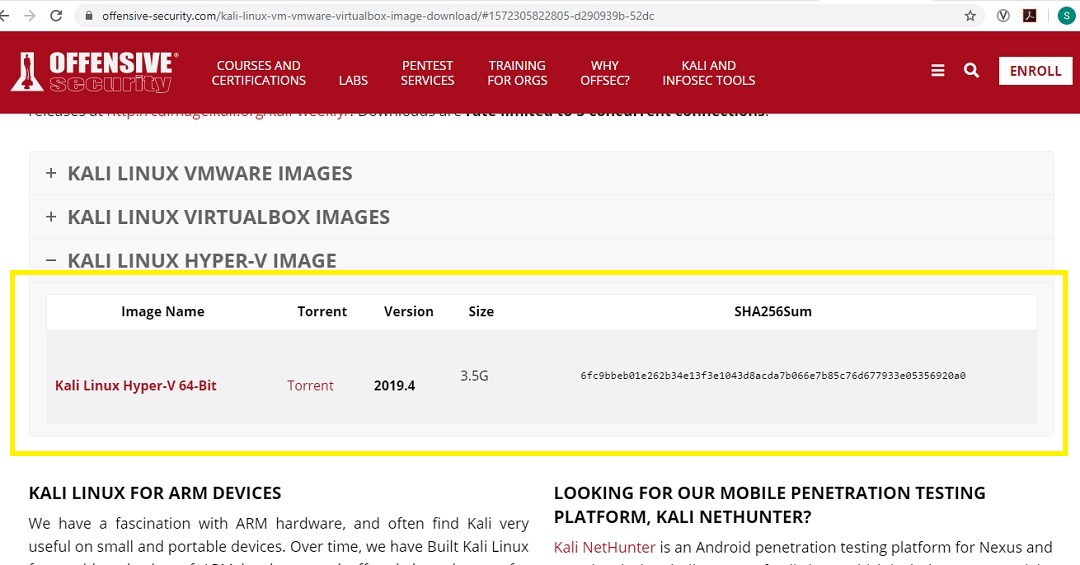
Kali Linux provides official images for Hyper-V. This can be downloaded from Kali Linux official custom image download page.
For Hyper-V, 64 bit is the only option available. The download size is around 3.5 GB. I recommend using torrent to download the file as it is much faster that direct download. The name of the downloaded file will be something like kali-linux-2019.4-hyperv.zip. Its an archive file
Step 2 – Extract the downloaded file
The file that would be downloaded will be a zip file. Extract the zip file. The name of the file will be something like kali-linux-2019-4-hyperv.zip. The extracted files would be around 10 GB. So make sure you have enough space in your hard drive.
Step 3 – Open Hyper-V Manager
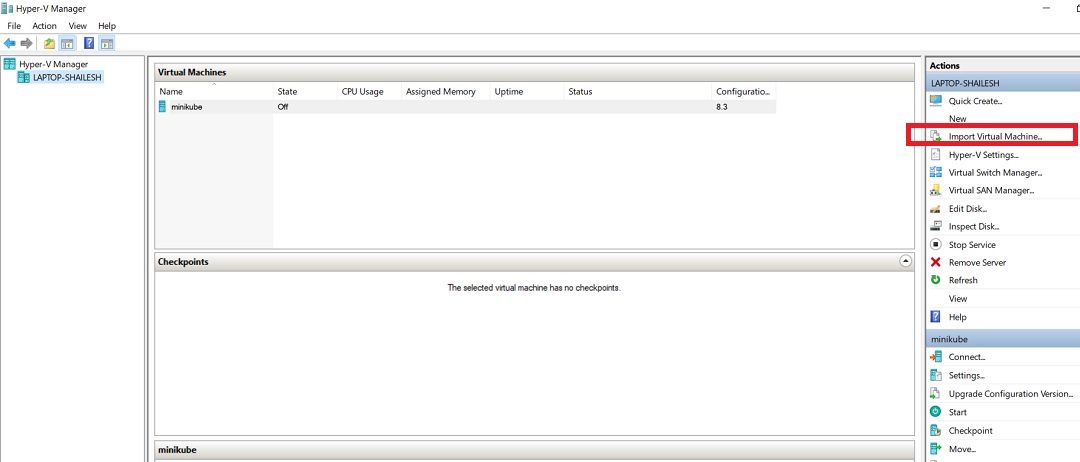
Open Hyer-V manager and click on Import Virtual machine and click on Import Virtual Machine.
Step 4 – Import Virtual Machine Wizard
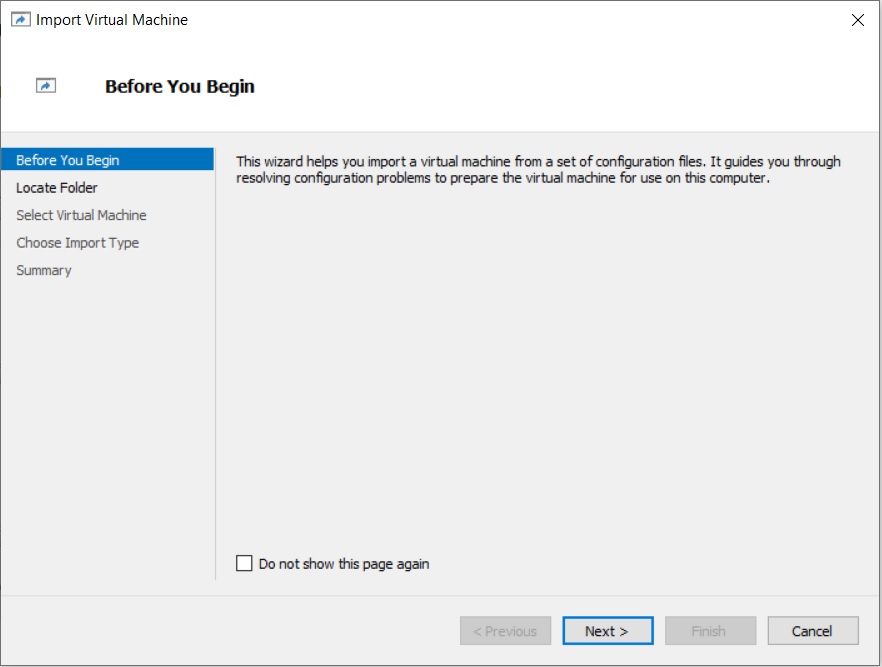
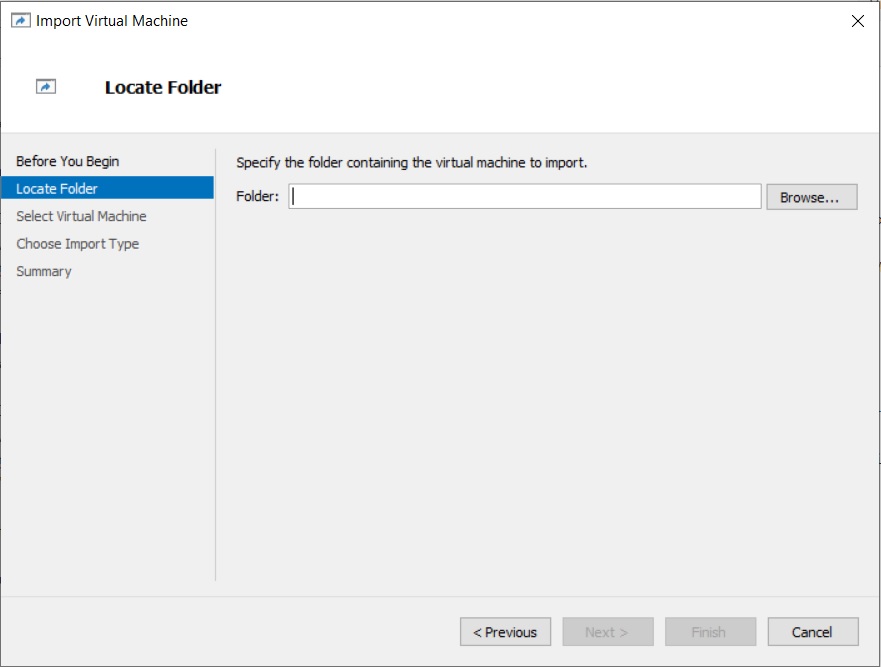
You will see a Import Virtual Machine Wizard.
Step 5 – Hyper-V Image Location
Browse to the location where you have extracted the Hyper-V Image files. Select the root folder which has other folders such as Snapshot, Virtual Hard Disks and Virtual Machines.
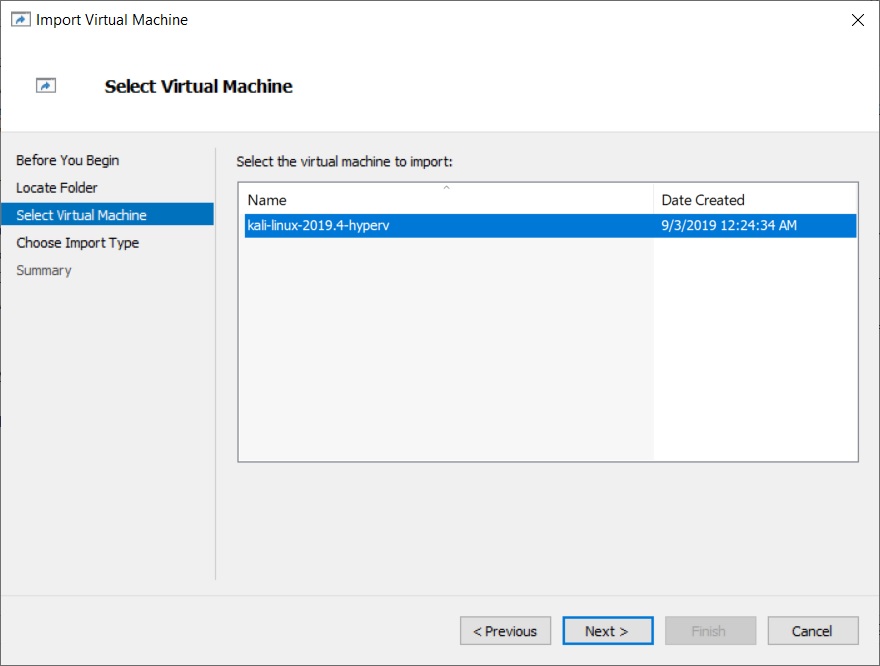
Step 6 – Select Virtual Machine
Now you will be asked to select the Virtual Machine. You will see only one option, click on next to continue.
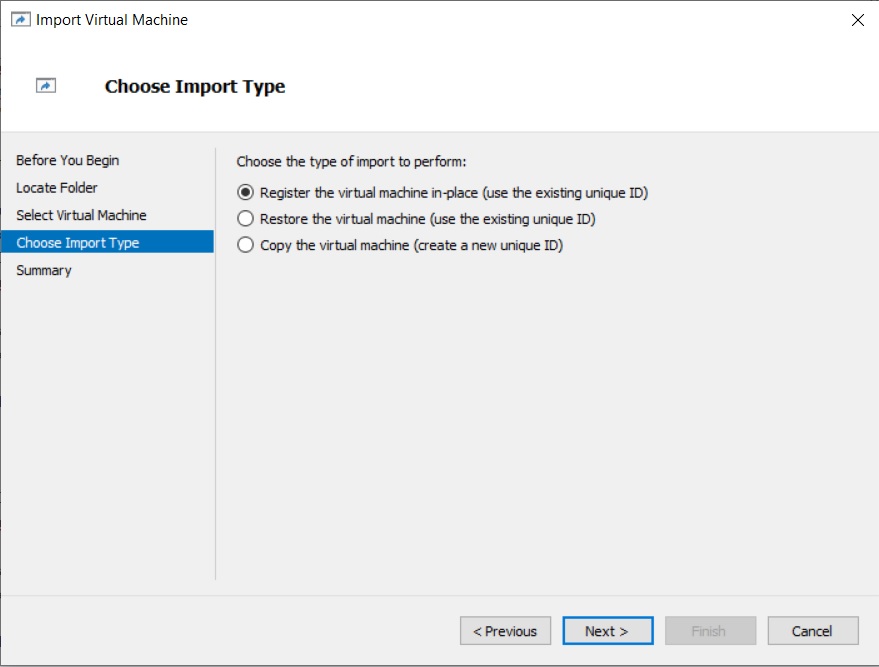
Step 7 – Choose Import Type
You will see various import types available. Leave the default “Register the Virtual machine in-place” and click next to continue.
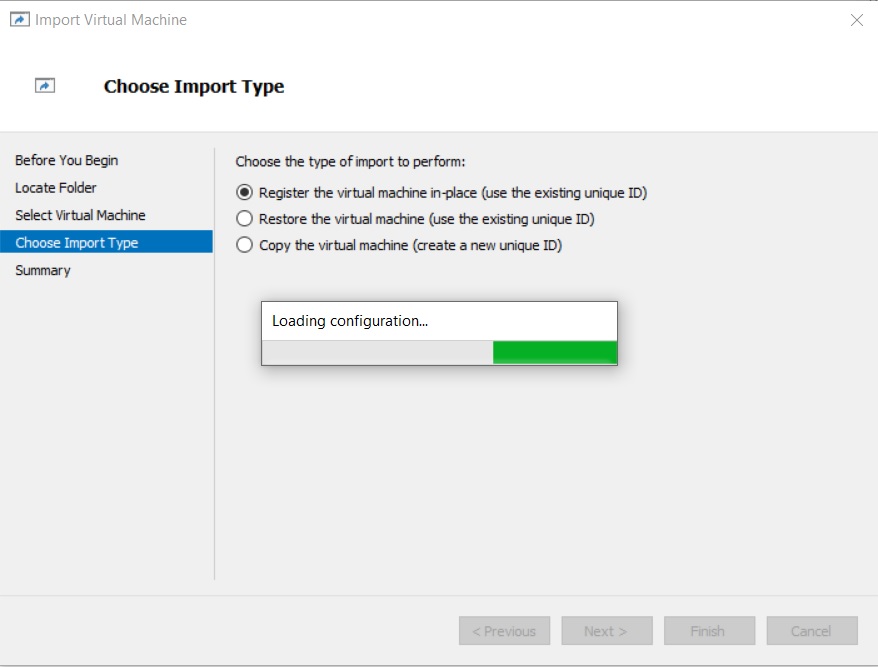
Step 8 – Summary
You will see that Hyper-V reads Virtual Image files.
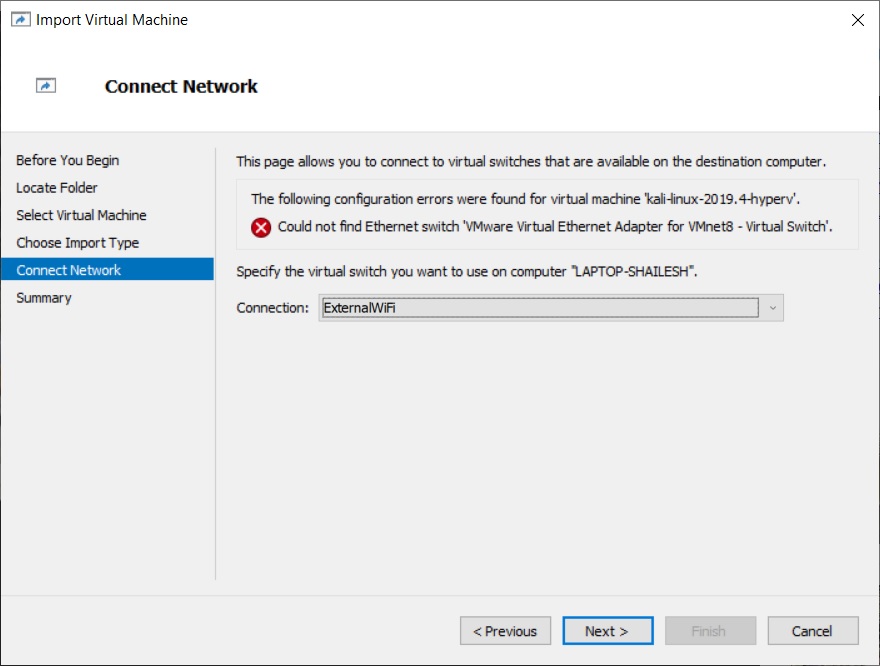
You will see an error related to the Network Connection. Select the default switch from the drop down list
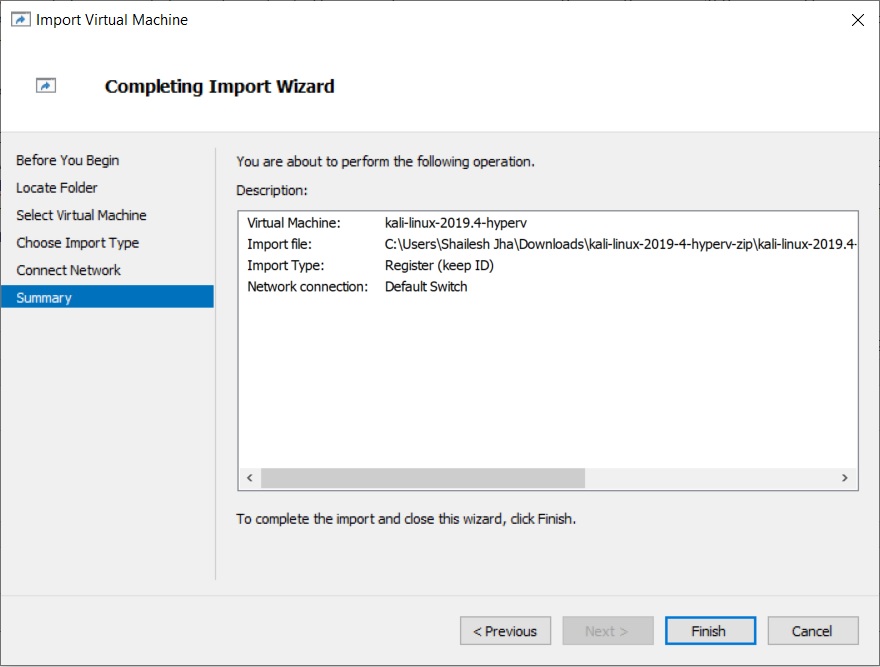
Click next to continue, Now you will see the summary.
Click on finish to complete the import of Kali Virtual Machine.
Step 8 – Connect to Kali Virtual Machine
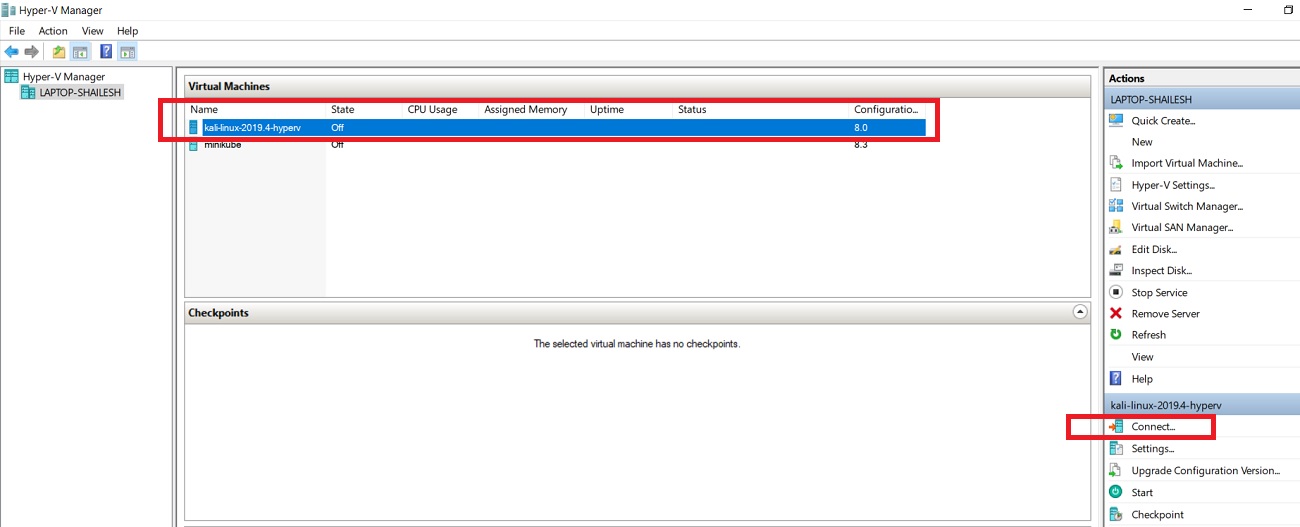
In the Hyper-V Manager you will see Kali Linux Virtual Machine. Select it and click on connect to start the VM.
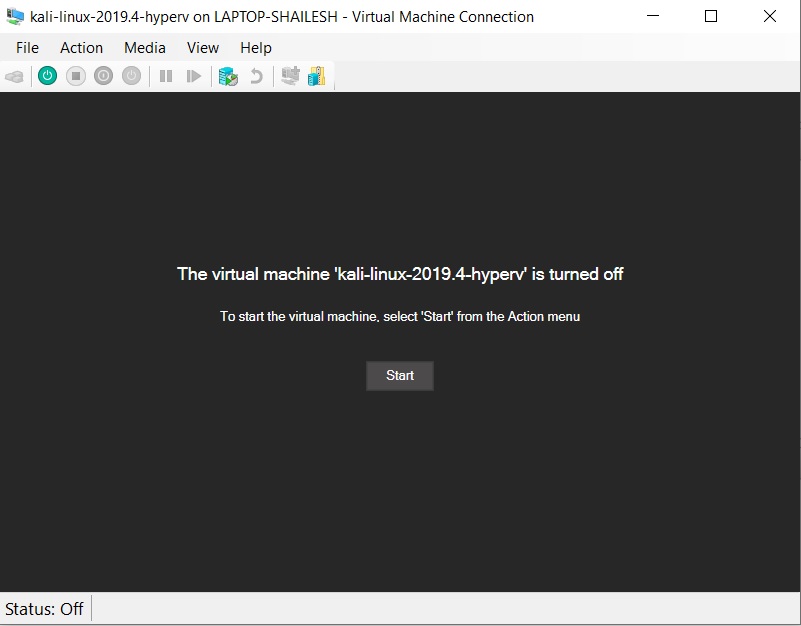
A new Window will Pop up. Click on Start to start the VM
Step 9 – Login to Kali Linux
You will see the GRUB boot loader and after sometime, VM will start and you will see the login screen.
Login with User name – root
Password – toor
You will login to Kali Linux. That’s it, you are done. You dont have to install VMware tools to switch to full screen mode. It is already installed as a part of the image. You can switch to full screen mode.
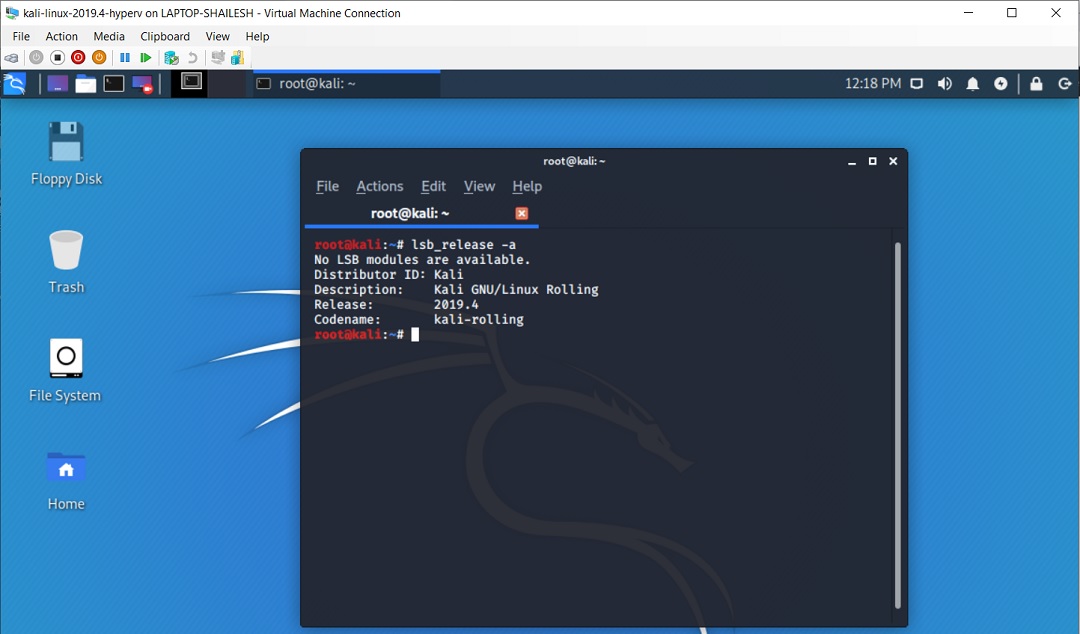
To check the version of Kali Linux Installed, open terminal and enter the command lsb_release -a. In the output, you will see the version.
That’s it, thanks for visiting my blog


ethernet is disconnetced from the machine error how can ı fix this
Please check the network in the VM settings. Make sure that you have it set to NAT.
after pressing kali Linux torrent button,it is downladed as torrent file type and is not opening….can u plz tell???
You have to make sure you have torrent software install to open downloaded torrent file. utorrent, or bittorrent are some example softwares you can use.